You can complete the installation of an electric chain hoist with confidence when you follow a step-by-step guide and prioritize safety. To install an electric chain hoist correctly, always verify compliance with standards such as OSHA, ASME B30.21, and IEC 60204-32, which address inspection, electrical safety, and operational practices.
Choose certified equipment from Powerful Machinery to ensure reliable performance and peace of mind during every installation.
Key Takeaways
Always assess the installation site to ensure it can support the hoist’s load and dynamic forces. This step is crucial for safety and reliability.
Gather all necessary tools and personal protective equipment (PPE) before starting the installation. Being prepared helps ensure a smooth process.
Select an electric chain hoist that meets your lifting needs and complies with safety standards. Choose a model with a load capacity at least 25% higher than your maximum expected load.
Conduct thorough inspections of the hoist and its components before installation. This practice helps prevent accidents and ensures reliable performance.
Perform a no-load test and a load test after installation to confirm the hoist operates correctly. Document all tests to maintain compliance and support warranty claims.
Site Preparation for Electric Chain Hoist Installation
Assess Structure and Space
You must begin your preparation by evaluating the site where you plan to install the electrical chain hoist. Check that the supporting structure can withstand the hoist’s rated capacity and dynamic loads. Inspect the beams or trolleys for adequate load-bearing capacity. Confirm the mounting type, whether you use a hook, lug, or trolley.
Examine fasteners and brackets for any signs of damage or corrosion. Make sure the area is clear, level, and free of structural defects. Measure available headroom and hook travel to ensure safe operation. Verify that the surrounding environment matches the specifications of your electric chain hoist.
Powerful Machinery’s certified products provide reliable installation and meet international safety standards.
Tip: Always confirm accessibility for maintenance and operation before proceeding with installation.
Prepare Tools and PPE
Gather all necessary tools and personal protective equipment before you start the installation. You need safety helmets, gloves, eye protection, and steel-toed boots to protect yourself during the process. Prepare wrenches, screwdrivers, lifting equipment such as a forklift or crane, and electrical testing equipment.
Review the manufacturer’s recommendations for any specialized tools required for your specific electric chain hoist model. Having the right equipment ensures a smooth and safe installation.
Clear and Inspect Area
Follow a systematic approach to inspect the site before setting up your electric chain hoist:
Identify the installation location and confirm the mounting surface can support both the hoist and its maximum load.
Verify that the power supply matches the voltage and amperage requirements of your hoist.
Assess the operating environment for humidity and temperature. Take additional protective measures if needed.
A thorough inspection helps you avoid delays and ensures a safe working environment. Powerful Machinery’s certified products make the installation process straightforward and dependable.
Choose and Inspect an Electric Chain Hoist

Select Capacity and Model
You should select an electric chain hoist that matches your lifting requirements and work environment. Powerful Machinery offers a range of certified hoists designed for different applications. Consider these factors when choosing the right model:
Load capacity: Pick a hoist rated at least 25% higher than your maximum expected load.
Application type: Determine if you need faster lifting speeds or frequent operation.
Safety features: Look for overload protection and emergency stop functions.
Environmental conditions: Assess temperature, humidity, and exposure to dust or corrosive substances.
Duty cycle: Decide if you need a light-duty hoist for occasional use or a heavy-duty model for continuous operation.
Compliance: Ensure the hoist meets industry safety and operational standards.
You should also plan for future needs. If your operations may expand, select a model that can handle increased loads or more frequent use.
Inspect Hoist and Components
Before installation, inspect your electric chain hoist and all related components. Use the table below to guide your inspection:
Inspection Point | Description |
|---|---|
Damage Check | Verify the hoist has not been marked out of service due to damage. |
Overall Appearance | Look for excessive oil leaks and confirm warning tags are visible and legible. |
Control Devices | Test all control devices for proper operation. |
Load Hook Inspection | Check for cracks, nicks, or deformation. |
Load Chain Inspection | Inspect for gouges, rust, and confirm the chain is clean and lubricated. |
Wire Rope Inspection | Ensure the wire rope is free of broken strands and abrasions. |
Limit Devices | Verify that limit devices function correctly. |
Operational Sounds | Listen for abnormal sounds or vibrations during operation. |
Braking Function | Assess for excessive drift or slippage during the first load lift. |
A thorough inspection helps prevent accidents and ensures reliable performance.
Review Documentation
You must review all documentation before using your electric chain hoist. Confirm the equipment is certified by a recognized organization. Check that the certification includes load scenarios and classification details.
Review records of periodic inspections to verify compliance with OSHA, ASME, and manufacturer guidelines. Proper documentation ensures your hoist meets safety standards and supports warranty claims.
Tip: Always keep certification and inspection records accessible for audits or future reference.
Mounting Options: Hook and Trolley
When you begin the installation process for an electric chain hoist, you must choose the right mounting option for your workspace. Powerful Machinery offers both hook-mounted and trolley-mounted hoists, including the HHSY and DHS models.
Each mounting method has unique advantages that suit different environments and requirements.
Hook Mount Steps
Hook mounting is a straightforward method that allows you to suspend the hoist from a secure point, such as a beam or a fixed bracket. This option works well for temporary installations or when you need to move the hoist between locations.
Step-by-step guide:
Inspect the supporting structure to confirm it can handle the full load, including dynamic forces during lifting.
Attach the hoist’s upper hook to the designated lifting point. Make sure the hook closes completely and the latch engages securely.
Check the alignment of the hoist. The load chain should hang vertically without twisting.
Tighten all fasteners and verify that the hoist cannot shift or rotate unexpectedly.
Test the hook’s locking mechanism before proceeding with the rest of the installation process.
Tip: Hook mounting offers flexibility and quick setup, making it ideal for jobs that require frequent relocation or temporary use.
Trolley Mount Steps
Trolley mounting provides smooth horizontal movement along a beam, which is essential for applications that require precise load positioning. The HHSY and DHS models from Powerful Machinery feature compact designs that maximize headroom, making them perfect for low-clearance areas.
Follow these steps for trolley mounting:
Select a compatible trolley for your hoist and beam size. Confirm the trolley’s load rating matches or exceeds the hoist’s capacity.
Assemble the trolley according to the manufacturer’s instructions. Secure all bolts and nuts.
Position the trolley on the beam. Ensure the wheels roll smoothly and the trolley sits level.
Attach the hoist to the trolley’s suspension point. Double-check that the connection is secure and the hoist hangs straight.
Move the trolley along the beam to test for smooth operation and proper alignment.
Lock the trolley in place if your application requires a fixed position.
Note: Trolley mounting is best for installations where you need to move heavy loads across a workspace with minimal effort.
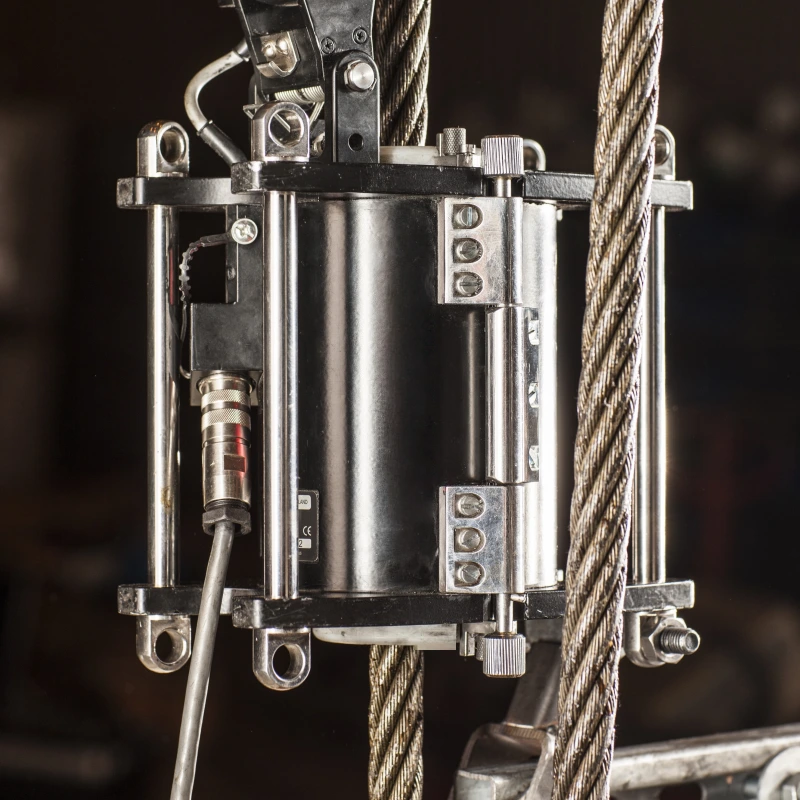
Chain Box and Bracket Setup
A proper chain box and bracket setup is crucial for a safe and efficient installation process. The chain box collects excess chain during operation, preventing tangles and reducing wear.
Attach the chain box to the designated bracket on the hoist body. Use the hardware provided by Powerful Machinery.
Make sure the box sits directly below the chain exit point. This alignment ensures the chain feeds smoothly into the box.
Secure the bracket tightly to prevent movement during operation.
Inspect the chain box for any sharp edges or obstructions that could damage the chain.
A well-installed chain box keeps your workspace organized and extends the life of your equipment.
Chain Alignment
Correct chain alignment is essential for safe operation and long-term reliability. Misalignment can cause excessive wear, jamming, or even accidents.
Position the hoist so it lifts loads vertically. Avoid any side pulling or angled lifting.
Check that the load chain runs straight from the hoist to the load hook.
Inspect the chain for twists or kinks before starting the installation process.
Operate the hoist without a load to observe the chain movement. The chain should move smoothly without binding or jumping.
Adjust the hoist or mounting point if you notice any misalignment.
Alert: Improper chain alignment increases the risk of chain failure and can trigger emergencies. Always verify alignment before using the hoist.
Comparison Table: Hook vs. Trolley Mounting
Feature | Hook-Mounted Hoists | Low Headroom (Trolley) Hoists |
|---|---|---|
Design | Suspended from a hook, allowing free movement | Compact design for limited vertical space |
Advantages | Versatile, easier installation process | Ideal for low clearance, maximizes vertical space |
Disadvantages | Needs more headroom, less practical in tight spaces | May cost more, limited by design constraints |
The HHSY and DHS models from Powerful Machinery stand out for their space-saving features. Their compact bodies minimize the distance between the hoist and the beam, making them ideal for installations in warehouses, temporary buildings, or any area with restricted headroom.
You gain both flexibility and efficiency, whether you choose hook or trolley mounting.
Emergency Reminder: Always ensure that emergency stop devices and limit switches are accessible and functional after completing the installation process. Test all emergency controls before putting the hoist into service.
Electrical Chain Hoist Installation and Setup
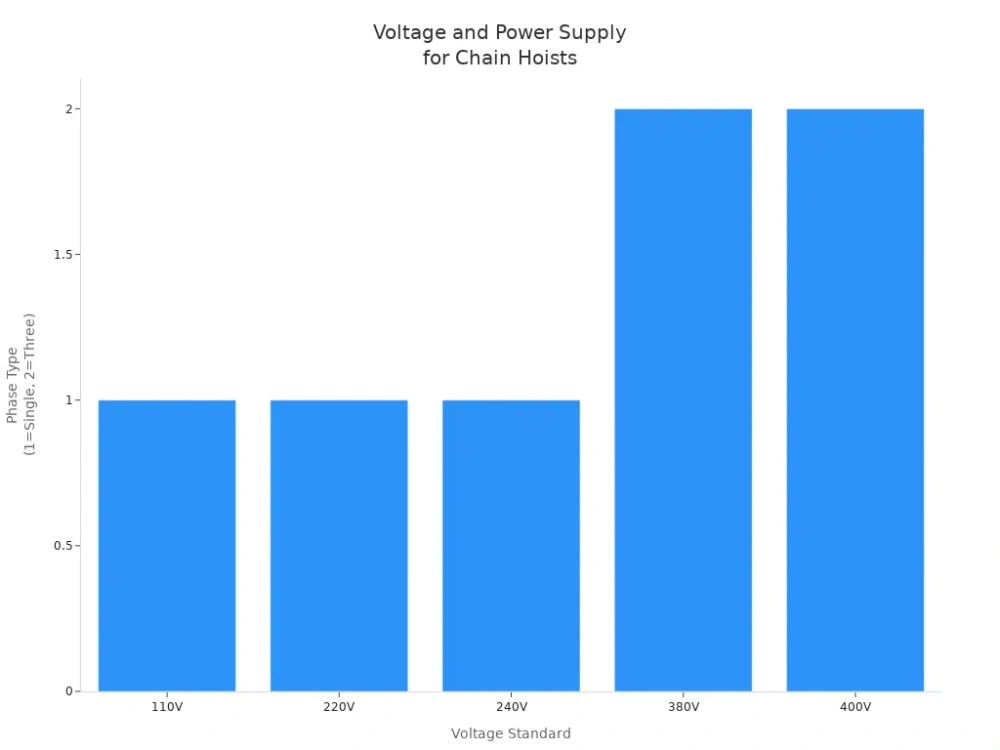
Power Supply and Voltage
You must verify the power supply before starting the electric chain hoist installation. Always check the voltage and frequency requirements for your specific model. Most electric chain hoists operate on standard industrial voltages, such as 110V, 220V, 380V, or 400V.
For heavier loads above 2.5 tons, you often need at least 230 volts, with some installations requiring up to 460 volts. Use the table below to match your hoist to the correct installation environment:
Voltage Standard | Power Supply Configuration | Frequency |
|---|---|---|
110V | Single-phase | 50/60 Hz |
220V | Single-phase | 50/60 Hz |
240V | Single-phase | 50/60 Hz |
380V | Three-phase | 50 Hz |
400V | Three-phase | 50 Hz |
Control voltage should always remain below 50V for safety. This reduces the risk of electrical shock during operation.
Wiring and Grounding
You must follow all electrical safety protocols during installation. Use only certified wiring and connectors that match the voltage and current requirements of your hoist. Proper grounding is essential for correct installation and to prevent electrical hazards.
Connect the ground wire securely to the designated terminal. Inspect all connections for tightness and insulation. Never run power cables near sharp edges or moving parts. Always follow NEC, OSHA, and Powered Machinery guidelines for compliance with safety regulations.
Tip: Double-check the wiring diagram in your manual before energizing the system.
Safety Devices
Install all safety devices as part of your electric chain hoist installation. These include limit switches, overload protection, and an emergency stop. Limit switches prevent the hoist from over-traveling, while overload protection stops operation if the load exceeds safe limits.
The emergency stop must be easy to access and tested after installation. You should also check that all safety devices function correctly before using the hoist. Correct installation of these features ensures compliance with safety regulations and protects both operators and equipment.
⚠️ Always test the emergency stop and all safety devices before commissioning your hoist.
Safety Checks Before Operation
Before you operate your electric chain hoist, you must complete a series of safety checks to guarantee correct installation and reliable performance. Powerful Machinery electric chain hoists feature advanced safety systems, but your diligence during inspections remains essential.
Always wear personal protective equipment and follow safety precautions throughout the installation and testing process.
Limit Switches and Brakes
Limit switches and brakes protect both operators and equipment. You should regularly test limit switches to confirm they stop the hoist at the correct positions, preventing over-travel. Check the brake for proper engagement to avoid uncontrolled lowering of the load.
Periodically test the motor and brake system for efficient operation. Use a daily pre-operational inspection to assess readiness. Inspect the hook and latch assembly for bending or stretching. Examine the control systems for responsiveness and reliability. Test brake functionality to ensure it holds the load securely.
Tip: Always verify the functionality of upper and lower limit switches before each use. This step prevents accidents and supports correct installation.
Lubrication and Chain Inspection
Proper installation includes thorough chain inspection and lubrication. You must inspect the chain for wear, damage, or foreign material. Look for stretched links, nicks, or gouges that indicate overloading or excessive wear. Check end connections for deformation.
Apply lubrication according to manufacturer recommendations and scheduled maintenance. Replace damaged chains immediately to prevent accidents.
Inspection Criteria | Maintenance Practices |
|---|---|
Inspect the chain for wear, damage, or foreign material | Ensure the chain is adequately lubricated |
Check for stretched links indicating overloading | Apply lubrication as per scheduled maintenance |
Inspect end connections for deformation or wear | Regularly replace damaged chains |
⚠️ Never operate the hoist if you find any chain defects during visual inspections.
Final Mechanical and Electrical Review
You must complete a final review before commissioning the hoist. Adjust limit switches to prevent over-travel. Test the brake system and controls, including up, down, and emergency stop functions. Conduct a load test using a weight within the hoist’s rated capacity.
Use your senses during operational tests to detect unusual sounds, vibrations, or visual anomalies. Document every inspection in a dedicated logbook to maintain compliance with industry standards. Implement a lockout/tagout system for any defective equipment.
Note: Periodic comprehensive inspections and meticulous documentation help ensure ongoing safety and correct installation.
Load Test and Commissioning
After you complete the electric chain hoist installation, you must perform a thorough load test and commissioning process. This step ensures your equipment operates safely and meets all regulatory requirements.
Powerful Machinery recommends following industry standards for every load test to guarantee both compliance and long-term reliability.
No-Load Test
Begin with a no-load test before you attempt any lifting with weight. This initial check helps you identify any mechanical or electrical issues that could affect performance. Follow these steps:
Run the hoist through its full range of motion without any load attached.
Test both lifting and lowering functions to confirm smooth operation.
Listen carefully for unusual noises, such as grinding or clicking, which may signal internal problems.
Activate the upper and lower limit switches to ensure they stop the chain at the correct points and prevent over-travel.
Tip: Always perform a no-load test after electric chain hoist installation and before every new rated load test. This habit helps you catch issues early and avoid costly downtime.
Static and Dynamic Load Test
Once you confirm the hoist works properly without a load, proceed to the static and dynamic load testing phase. These tests verify the hoist’s ability to handle its rated capacity and ensure all safety mechanisms function as intended.
Static Load Test
For the static load test, you must:
Attach a test load equal to 125% of the hoist’s rated capacity.
Lift the load just off the ground and hold it steady for 10 to 20 seconds.
Observe the hoist for any signs of structural deformation or brake slippage.
Dynamic Load Test
After passing the static test, move on to the dynamic load test:
Reduce the test load to 110% of the hoist’s rated capacity.
Operate the hoist through its full range of motions, including lifting, lowering, and traversing (if trolley-mounted).
Check for smooth operation, proper brake function, and responsive controls.
The table below summarizes the requirements for each type of load test:
Test Type | Load Requirement | Purpose |
|---|---|---|
Static Load Test | 125% of nominal | To check the load-bearing structure and brake. |
Dynamic Load Test | 110% of nominal | To test all functions and intended operations at maximum working speed. |
⚠️ Never skip load testing after electric chain hoist installation. These tests are critical for safety and compliance.
Record and Document Results
Proper documentation of your load test is essential for compliance, warranty, and future inspections. You should create a detailed record for every rated load test and commissioning procedure. Include the following information in your documentation:
Requirement | Description |
|---|---|
Unique Identification | List the unique serial number permanently marked on the hoist. |
Product Description | State the model number, Working Load Limit (WLL), and type of hoist. |
Test Information | Record the proof load applied and confirm the hoist passed the test. |
Standard of Conformity | Reference the standard to which the test was conducted (e.g., ASME B30.16). |
Manufacturer and Date | Identify the manufacturer and include the date the test was performed. |
Authorized Signature | Obtain a signature from an authorized person in the manufacturer’s quality control department. |
Note: Keep all load test records in a secure location. These documents prove your compliance with industry standards and support warranty claims for your Powerful Machinery hoist.
By following these steps, you ensure your electric chain hoist installation meets the highest standards of safety and performance. Load testing and proper documentation protect your investment and provide peace of mind for every lifting operation.
Train Operators and Maintain the Electric Chain Hoist
Operator Training Requirements
You must train operators before allowing them to use an electric chain hoist. Operator training covers more than just basic controls. It includes recognizing wear, identifying malfunctions, and understanding emergency procedures. Operators must be at least eighteen years old and complete an accredited course.
Training covers pre-operation inspections, load calculations, and safe lifting techniques. You also learn about personal protective equipment and hazard identification. Ongoing training helps you keep up with changing standards and best practices.
Powerful Machinery offers pre-training consultations and compliance instruction to support your team.
Tip: Regular operator training reduces accidents and ensures proper installation and use of your equipment.
Daily Inspection and Reporting
Daily inspections keep your electric chain hoist safe and reliable. You should check the entire chain for nicks, burrs, twisted links, and corrosion. Inspect hooks for signs of opening or cracks, and test the safety latch.
Test the brakes by lifting a light load and make sure it holds without drift. Run the hoist through its full range of motion to check for smooth operation. Always verify the identification tag and working load limit.
Inspection Step | Description |
|---|---|
Visual Inspection | Check all load chains for gross damage. |
Hoist Security | Ensure the hoist is properly secured. |
Load Limit | Confirm the load does not exceed the warning label. |
Operation Check | Verify smooth and regular motions. |
Chain Condition | Ensure the chain is not kinked or damaged. |
Maintenance Schedule
You must schedule maintenance to keep your hoist in top condition. Daily inspections help you spot visible wear and unusual noises. Clean and lubricate moving parts every month. Inspect electrical connections and control systems every quarter.
Arrange for a comprehensive inspection by a qualified technician each year. Always keep detailed records of all maintenance activities. Powerful Machinery provides onsite evaluations and documentation support to help you stay compliant.
Daily: Inspect for wear and document findings.
Monthly: Clean and lubricate moving parts.
Quarterly: Inspect electrical systems.
Annually: Schedule a full inspection by a technician.
Note: Schedule maintenance to prevent unexpected breakdowns and extend the life of your equipment.
Troubleshooting Common Issues
You may encounter issues during installation or operation. If the hoist does not start, check the power supply and inspect for burned or loose wires. If the chain jams, look for foreign objects or damaged links. For brake failures, inspect the mechanism and replace worn pads.
If you notice low voltage, measure at the input terminal. Always replace faulty contactors and lubricate moving parts as needed. Train operators to recognize these problems and respond quickly. Regular inspections and scheduled maintenance help you avoid most issues.
⚠️ Address problems early to maintain safety and avoid costly repairs.
Conclusion
You ensure safety and compliance when you follow each step in this step-by-step guide. Always review the operation manual and equip your team with PPE. Choose sturdy fixation points and verify the structure’s load capacity.
Regular maintenance and operator training protect your investment. For complex installations, Powerful Machinery offers expert sales and service support:
Type | Description |
|---|---|
Sales | An expert team provides personalized recommendations and competitive pricing for hoist selection. |
Service | Professional maintenance and repair services to ensure equipment performance and safety. |
FAQ
How do you choose the right electric chain hoist for your application?
You should match the hoist’s capacity to your maximum load. Consider your workspace, lifting speed, and duty cycle. Powerful Machinery offers certified models for various environments. Review product specifications and consult with experts for tailored recommendations.
What safety checks must you perform before using an electric chain hoist?
You need to inspect the chain, hooks, and brakes. Test limit switches and emergency stops. Verify the hoist’s mounting and electrical connections. Always wear PPE. Document your inspection results for compliance.
How often should you maintain your electric chain hoist?
You should inspect your hoist daily and perform monthly lubrication. Schedule quarterly electrical checks and annual professional inspections. Maintenance keeps your equipment reliable and extends its lifespan.
Tip: Regular maintenance reduces downtime and improves safety.
What should you do if your electric chain hoist stops working?
Check the power supply and inspect all wiring. Examine the chain and brake system. Refer to the manufacturer’s manual. Contact Powerful Machinery’s support team for expert troubleshooting and repairs.