Ready to tackle a hands-on project? You can learn how to build a hydraulic lift table using simple tools. Hydraulic lift tables help you move heavy items with less effort and reduce the risk of injury. You get a stable platform that adjusts to the height you need, making your workspace safer and more efficient.
Powerful Machinery is a trusted source for reliable lift tables and components. Always put safety first and make sure you understand the project scope before starting.
Key Takeaways
Hydraulic lift tables make moving heavy items easier and safer, reducing the risk of injury in various industries.
Using a hydraulic lift table can increase productivity by up to 20% and reduce injuries by up to 50%.
Building a hydraulic lift table requires basic tools and materials, making it accessible for DIY enthusiasts.
Regular maintenance and safety checks are essential to ensure the lift table operates smoothly and safely.
Customization options, like guardrails and rotating platforms, enhance the functionality of your hydraulic lift table.
Hydraulic Lift Table Benefits & Uses
Material Handling Applications

You might wonder where you can use a hydraulic lift table in your daily work. These tables show up in all sorts of industries because they make moving heavy things much easier. Take a look at how different fields use them:
Industry | Primary Applications |
|---|---|
Industrial Manufacturing | Lifting and transferring heavy materials, machine loading/unloading, and quality control |
Warehousing and Logistics | Pallet handling, order picking, sorting, and consolidating goods |
Construction | Working at height, material placement, equipment testing, and calibration |
Healthcare | Adjustable exam tables, therapy tables for rehab exercises |
Retail | Product display, merchandising, and inventory management for heavy merchandise |
If you work in a warehouse, you can use a lift table to move pallets or sort goods. In construction, you can raise materials to the right height for safe placement. Even in healthcare, adjustable tables help patients feel comfortable.
Powerful Machinery’s lift tables come in many models, so you can find one that fits your job—whether you need a mobile table for quick moves or a heavy-duty table for big loads.
Ergonomics & Safety
You want to keep your team safe and productive. Many injuries at work happen because people lift heavy things the wrong way or work in awkward positions. A hydraulic lift table helps you avoid these problems by raising or lowering items to the best height for your body. This simple change can make a big difference.
Evidence Type | Description |
|---|---|
Ergonomic Injuries | Sprains and strains from heavy lifting and awkward postures are common in warehouses. |
Productivity | Workers feel safer and work better in a safe environment. |
Optimal Heights | Lift tables position loads at the right height, reducing strain and preventing injuries. |
Studies show that using lift assist tools like these can cut back injuries by up to 50%. One major car manufacturer saw a 70% drop in back injuries after switching to hydraulic lift tables. You also get a boost in productivity—some companies report a 20% increase after making the switch.
Powerful Machinery’s tables include safety features like overload protection and emergency stops, so you can trust them to keep your workplace safe.
Materials & Tools for Making a Hydraulic Lift Table
Essential Parts & Components
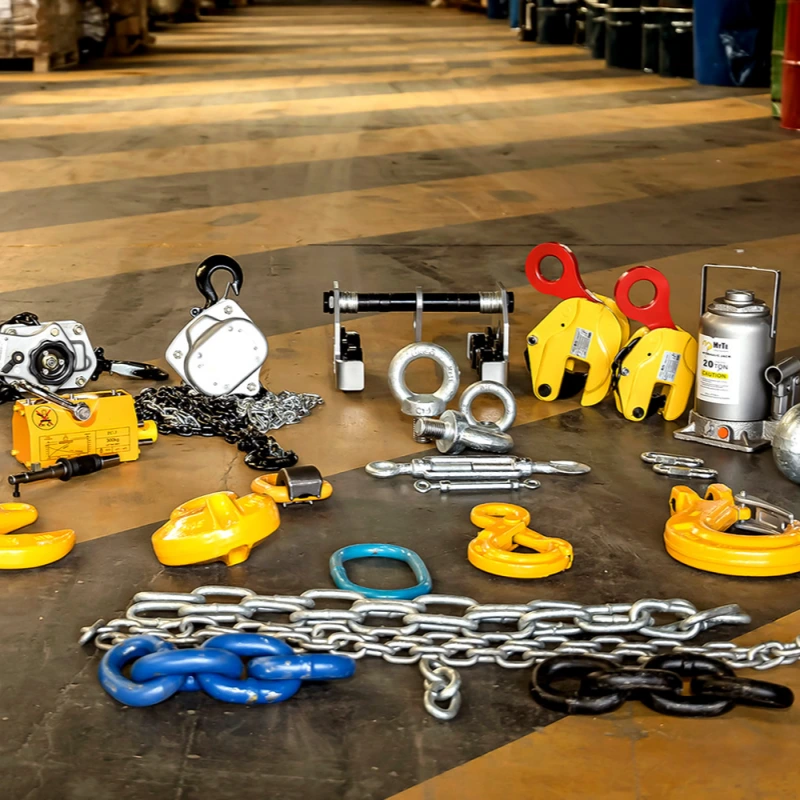
You want to build a hydraulic lift table that works safely and lasts a long time. Start with the right materials and components. Here’s what you need:
Heavy-duty steel for the frame and scissor mechanism
Hydraulic cylinders for lifting power
Hydraulic pump and control valves to move the platform
A sturdy platform for your cargo, with options like guardrails or ramps
Base frame to support the whole structure
Safety features such as overload protection, limit switches, and emergency stops
Motor or power source, matched to your local voltage
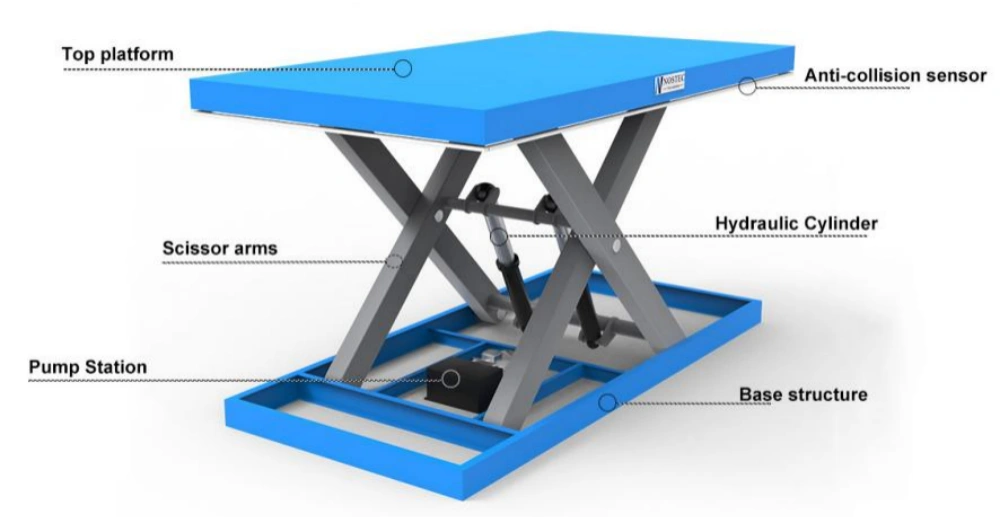
The scissor legs give you height adjustment and stability. The hydraulic cylinders make lifting easy. You can customize the platform for your needs, adding rails or ramps if you want extra safety.
Simple Tools Needed
You don’t need fancy equipment to get started. Most people can build a basic lift table with tools found in a home workshop. Here’s a quick list:
Tape measure and marker for accurate cuts
Angle grinder or metal saw for cutting steel
Drill and drill bits for making holes
Wrenches and sockets for assembly
Welding machine for joining steel parts
Screwdrivers for attaching small components
Safety gear like gloves, goggles, and ear protection
Tip: Always wear safety gear when working with metal and hydraulic parts. Double-check your measurements before cutting or welding.
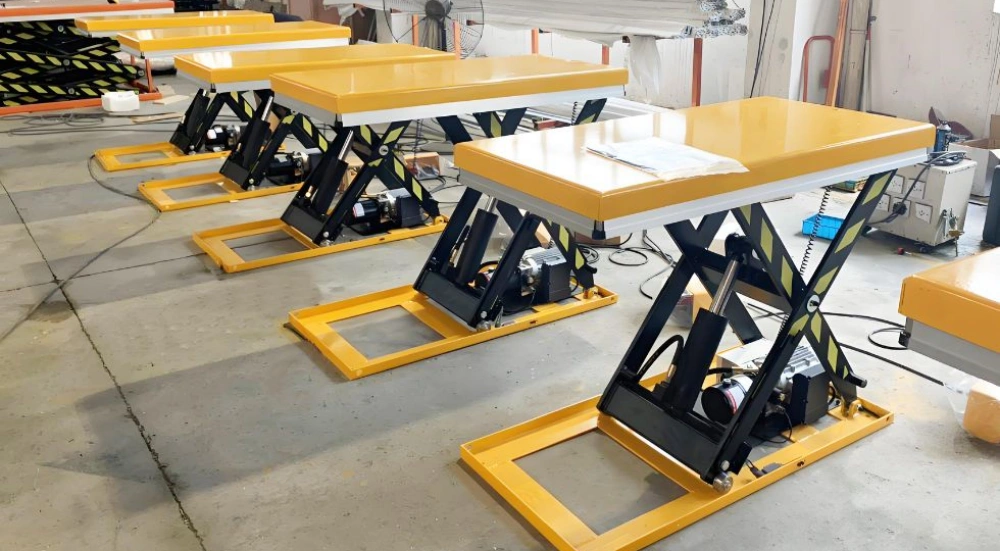
Powerful Machinery Product Options
If you want reliable parts or a ready-made solution, Powerful Machinery offers several models and custom options. Check out these choices:
Model | Capacity (kg) | Min. Height (mm) | Max. Height (mm) | Table Dimension (mm) | Foot Pedal Strikes | Net weight (kg) |
|---|---|---|---|---|---|---|
CYT-B300 | 300 | 275 | 810 | 750x500x45 | 25 | 75 |
CYT-B500 | 500 | 295 | 1020 | 900x600x48 | 32 | 85 |
Durable construction with high-strength steel and solid lifting rods
Safety overload system and reinforced fork frame
Compact size for tight spaces in warehouses and factories
Custom wheel types and fork load configurations
You can choose a model that fits your workspace and lifting needs. Powerful Machinery’s products help you build a safe and efficient hydraulic lift table with confidence.
How to Build a Hydraulic Lift Table: Step-by-Step Guide
Ready to roll up your sleeves? You’re about to learn how to build a hydraulic lift table from scratch. This step-by-step guide walks you through making hydraulic lift table components, assembling a scissors lift table mechanism, and installing the hydraulic system.
You’ll finish by attaching the platform and checking your work. Let’s get started!
Build Table Frame
You need a strong frame as the foundation for your scissors lift table. Choose your material based on your needs. Mild steel works well for most projects because it’s affordable and easy to weld. If you want a lighter frame, high-strength alloys or aluminum are options, but they cost more and require special welding.
Here’s a quick comparison:
Material | Advantages | Considerations |
|---|---|---|
Mild Steel | Favorable strength-to-cost ratio, weldability | Heavier, may need corrosion protection |
High-strength Alloys | Reduced weight | Higher cost, special welding needed |
Aluminum | Lightweight for mobile tables | Needs larger sections, may lose weight advantage |
Measure and cut your steel pieces for the base and top frame. Use a tape measure and marker for accuracy. Weld the pieces together, making sure the corners are square. The frame should match the size of your platform and support the weight you plan to lift. Most scissors lift table frames use rectangular tubing for strength.
Tip: Double-check your measurements before welding. A square frame keeps your scissors lift table stable.
Assemble Scissors Lift Table Mechanism
Now you’ll build the heart of your hydraulic lift table—the scissors lift table mechanism. This part lets your table move up and down smoothly.
Follow these steps:
Gather all the scissor arms, dowels, washers, and connecting rods.
Drill holes in the center of each scissor arm for the threaded rod. Use washers and lock nuts to secure the rod.
Attach the scissor arms to the adjustment mechanism. Screws and washers prevent grinding and keep the movement smooth.
Fix the sliders to the scissor arms. Make sure the pegs face the right direction.
Assemble all parts, keeping proper spacing so the scissors lift table moves freely.
The length of the scissor arms and the number of stages depend on how high you want your table to go. Single-stage scissors lift tables usually reach three to four times their collapsed height. If you need more height, add double or triple stages, but remember this increases complexity and weight.
Note: Keep all moving parts clean and lubricated. This helps your scissors lift table operate smoothly and last longer.
Install Hydraulic System
You’re ready to add the power behind your scissors lift table. The hydraulic system lifts and lowers the platform with ease.
Here’s how to build a hydraulic lift table hydraulic system:
Mount the hydraulic cylinder between the base frame and the scissor mechanism. Make sure it’s centered for balanced lifting.
Connect the hydraulic pump and control valves. Secure all hoses and fittings tightly to prevent leaks.
Attach the power source. For manual tables, use a foot pump or hand lever. For electric tables, connect the motor and wiring.
Test the hydraulic system. Pump or activate the controls to raise and lower the scissors lift table. Watch for smooth movement and check for leaks.
Don’t overload your hydraulic lift table. Always stay within the rated capacity. Place loads in the center of the platform to avoid tipping. Regular maintenance keeps your scissors lift table safe and reliable.
Alert: Never disable safety features like overload protection or emergency stops. These keep you safe during operation.
Attach Platform
The last step in making a hydraulic lift table is attaching the platform. This is where you place your cargo or materials.
Choose a platform material that matches your needs. Steel works for heavy loads. Aluminum is lighter for mobile tables.
Cut the platform to size. Add guardrails or ramps if you want extra safety.
Bolt or weld the platform to the top of the scissors lift table mechanism. Make sure it’s secure and level.
Test the platform by raising and lowering the scissors lift table. Check for stability and smooth operation.
You’ve finished building your hydraulic lift table. Now you know how to build a hydraulic lift table that fits your workspace and lifting needs. If you want to upgrade, Powerful Machinery offers ready-made scissors lift table models and custom options.
Callout: Operator training is important. Learn the controls and follow safety procedures every time you use your scissors lift table.
You’ve learned how to build a hydraulic lift table step by step. Making hydraulic lift table projects is easier when you follow these instructions and use quality parts. Your scissors lift table will help you lift, move, and work safely.
Safety & Testing for Hydraulic Lift Table
Stability Checks
You want your hydraulic lift table to stay steady and safe. Start by looking for visible damage like bent frames or leaking hydraulics. Test the controls to make sure everything moves smoothly. Check that safety features such as guardrails and emergency stops work as intended.
Step | Description |
|---|---|
1 | Look for visible damage like bent frames or leaking hydraulics. |
2 | Test the controls to ensure smooth operation. |
3 | Verify that safety features (e.g., guardrails or emergency stops) are functional. |
Regularly inspect hydraulic cylinders and hoses. Watch for cracks, leaks, or worn spots. Keep the lift table level and secure before you use it. Powerful Machinery’s tables include service locks and safety trip bars to prevent accidents.
Tip: Keep your work area clean and organized. This helps prevent slips and falls.
Hydraulic System Testing
After you assemble your lift table, you need to test the hydraulic system. Position the table at mid-height and engage maintenance bars. Check the hydraulic fluid level with a dipstick or sight glass. Inspect cylinders and hoses for leaks or damage. Make sure all fittings are tight and sealed.
Procedure Type | Steps |
|---|---|
Hydraulic System Inspection | Check fluid levels, inspect cylinders and hoses, verify fittings, and examine the pump and reservoir. |
Operational Performance Test | Run no-load test, check smooth movement, test platform drift, perform load testing, time cycles, listen for unusual noises, and verify controls. |
Powerful Machinery’s hydraulic lift tables meet EN 1570 and CE standards. You get features like hydraulic velocity fuses, flow control valves, and locking mechanisms for extra safety.
Troubleshooting Tips
Sometimes things go wrong. Here’s what you can do:
Check for hydraulic leaks in hoses and fittings.
Monitor fluid levels and replace if dirty or low.
Lubricate moving parts at least twice a month.
Tighten loose set screws and check pin shafts.
Inspect hydraulic and electrical systems before each use.
Make sure outriggers sit firmly on solid ground.
If your lift won’t lower, check the solenoid valve and adjust the flow control. If it won’t raise, make sure the load is within limits and inspect the motor and oil level. For lifts that fail to hold, look for leaks in the down valve.
Callout: Powerful Machinery’s hydraulic lift tables come with certifications like ATEX, EN 1570, and CE marking. You can trust their safety features to keep your workspace secure.
Conclusion
You’ve learned how to build a hydraulic lift table step by step. Using quality parts from Powerful Machinery boosts reliability and keeps your workspace safe. If you want more features, check out these customization options:
Custom Feature | Benefit |
|---|---|
Rotating platform | Easier access and efficiency |
Folding edges | Adaptability for different jobs |
High-capacity design | Handles heavy loads |
Keep your lift table in top shape with these tips:
Lubricate moving parts
Check hydraulic fluid and filters
Test safety features
Store in a dry place
Stay safe and enjoy your new hydraulic lift table!
FAQ
What makes an adjustable height table useful for my project?
You get flexibility with an adjustable height table. You can raise or lower the platform to match your needs. This feature helps you handle heavy items safely. Your project becomes easier because you avoid awkward lifting and reduce strain.
How do I choose the right materials for my adjustable height table project?
You start by looking at your project requirements. Pick strong steel for the frame. Select a hydraulic cylinder that fits your adjustable height table. Make sure your platform supports the weight you plan to lift. Your project needs reliable parts for safety.
Can I customize my adjustable height table for my project?
Yes, you can! You add guardrails, ramps, or a larger platform. You change the lift height or load capacity. Your project lets you build an adjustable height table that fits your workspace. You make adjustments to suit your needs.
What safety checks should I do before using my adjustable height table in a project?
You inspect the frame for damage. You check hydraulic hoses for leaks. You test the controls and safety features. Your project stays safe when you follow these steps. You keep your adjustable height table in good shape.
How often should I maintain my adjustable height table during my project?
You clean and lubricate moving parts twice a month. You check hydraulic fluid levels. You inspect for loose bolts or worn parts. Your project runs smoothly when you maintain your adjustable height table regularly. You prevent breakdowns and keep your workspace safe.