A shackle is a small component in a lifting assembly, but the entire load path may depend on that connection. To use a shackle correctly, select a rated model for the planned load and connection geometry, inspect the body and its matching pin, connect the mating components without forcing the fit, secure the pin as directed by the manufacturer, and check the complete load path before lifting.
If the shackle cannot remain in its approved loading position, change the arrangement rather than relying on the hardware to align itself under tension.
This guide focuses on metal shackles used in industrial lifting and rigging. It is intended for buyers and rigging teams that need a clear sequence from selection through removal. It does not replace the instructions for a specific shackle, a lift plan, competent-person inspection, or the rules that apply at your worksite.
Those requirements determine what is permissible when a connection is unusual or service conditions are severe.
Know the Shackle Before You Connect It
A shackle consists of a body and a removable pin. The curved end of the body is often called the crown or bow; the two ends that receive the pin are the eyes. A bow, or anchor, shackle has a wider, rounded body, while a Dee, or chain, shackle has a narrower profile.
Either body style may be supplied with a screw pin or a bolt-type pin, depending on the model. Body shape and pin style are separate selection factors, not shortcuts to a capacity rating.
If you are comparing designs, our guide to shackle types explains the common combinations. The practical point here is simple: read the exact product identification, working load limit (WLL), dimensions, and use instructions before placing the shackle in a load path.
A bow body does not provide blanket permission for side loading or for several sling legs to bear at any angle. A Dee body should not be treated as a substitute when the arrangement requires additional room for multiple components. Both styles require an approved connection geometry.
You will also see different model families in a catalogue. Powerful Machinery lists G-209 screw-pin anchor shackles and G-210 screw-pin chain shackles, alongside G-2130 safety-bolt bow shackles and G-2150 safety-bolt Dee shackles.
These names identify different body and pin arrangements; they do not make the models interchangeable. Check the current drawing and markings for the exact item being supplied, especially when a project specification requires a particular style.
How to Use a Shackle Step by Step?
Step 1: Define the Load and Connection
Before selecting hardware, identify what the shackle will connect. Is it joining a sling eye to a lifting point, a chain assembly to another fitting, or a hook to a padeye? Determine the maximum load in the proposed arrangement, the direction of pull, the number of components at the connection, and whether the parts may move or rotate during use.
The force at a shackle can differ from the weight of the object being lifted; sling angles, unequal leg loading, movement, and other lift features can change the forces in individual connections. The lift plan should account for those forces rather than relying on object weight alone.
Confirm the intended service as well. Overhead lifting, towing, mooring, and load restraint are not automatically equivalent applications. Do not assume a product offered for one purpose is suitable for another simply because it has a similar shape or an apparently high rating in a catalogue.
Where temperature, chemicals, seawater, repeated movement, or vibration are involved, inform the supplier and check the manufacturer’s limits for the specific model and finish.
Step 2: Select a Rated Shackle That Fits
Choose a shackle with a clearly identified WLL appropriate for the planned load path and approved use. Check the rating of the entire assembly, including the sling, hook, lifting point, and other connectors; the shackle cannot make a lower-rated component safe.
Do not derive the shackle’s WLL from its diameter, breaking load, or a generic safety-factor calculation. Use the marking and current product documentation for that exact model. If the marking is missing or illegible, do not infer the rating from a similar-looking shackle.
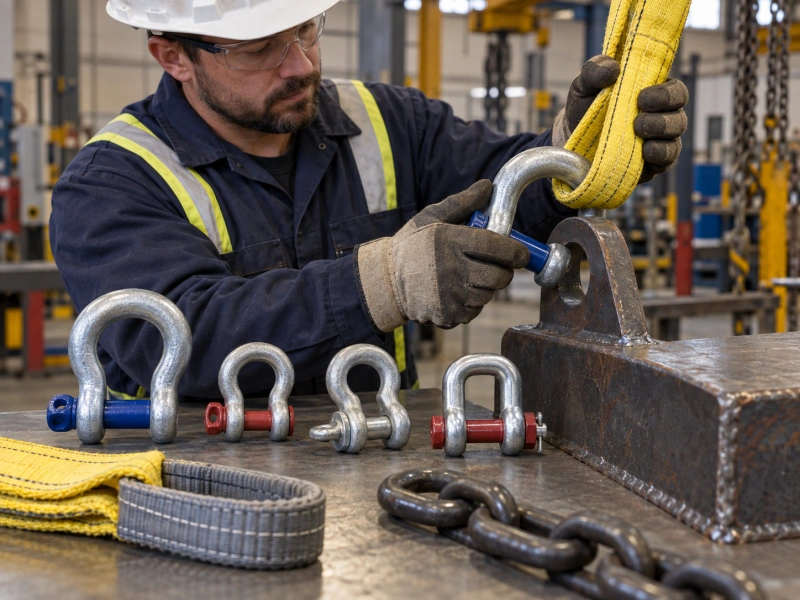
Then check physical fit. The pin must suit the hole or link through which it passes, and the body must allow the mating component to seat without binding or damaging the shackle. Allow room for the pin head, nut, and retaining device where applicable.
A connection that can be assembled only by hammering, wedging, or pulling the parts sideways is not an acceptable fit. Our shackle size guide helps you compare published dimensions, while how to measure a shackle shows where to take measurements when matching an existing part. Treat dimensions as fit information, not as proof of lifting capacity.
Consider the closure at this stage, not after installation. A screw-pin model can be convenient when a connection is assembled and removed frequently. A bolt-type design with its specified nut and retaining pin may be a more appropriate starting point where the connection remains in place or where movement could loosen a screw pin.
The final choice still depends on the model instructions and actual service conditions. Never attempt to make a long-term or vibration-prone connection safe by inventing a pin-retention method on site.
Step 3: Inspect the Body and Matching Pin
Inspect the shackle before use in accordance with your site procedure. Check that the identification and WLL markings are legible and that the body and pin belong together. Look for cracks, bending, twisting, stretched or elongated eyes, excessive wear, deep gouges, corrosion or pitting, damaged threads, heat or electrical damage, and signs that the shackle has been welded or otherwise modified.
Check that the pin is straight and that all required nuts and retaining parts are present. If anything raises doubt, remove the item from service for competent assessment; do not use a trial lift to determine whether it is sound.
Do not substitute a general-purpose bolt or a pin borrowed from another shackle. Even if it appears to fit, its dimensions and strength may not match the original assembly. Do not straighten a bent body, improvise a thread repair, or conceal damage under paint.
Follow the manufacturer’s and workplace’s rejection and replacement procedures. A competent person should also carry out any periodic inspections required by the applicable rules and service conditions; there is no useful universal calendar interval for every site.
Step 4: Position the Connection Without Forcing It
Remove the pin as directed for the model and place the mating component in the intended bearing area of the shackle. Keep the planned pull aligned with the shackle’s approved loading direction. Check that the attached eye, link, lug, or sling is not perched on an edge, jammed against the pin head, or bearing on the threads.
A wide component should not force the shackle eyes apart, and a narrow component should not create an unintended eccentric load. The lift plan and manufacturer instructions determine whether spacers or another arrangement are appropriate; do not add loose parts as an improvised fix.
It can be tempting to choose a bow shackle whenever a connection looks crowded. The wider, rounded body can provide more room, but available space is only one requirement.
If two sling legs or more than one fitting meet in the bow, confirm that the exact model permits the arrangement, that the included angles and bearing points are acceptable, and that the calculated force remains within the applicable rating. If those details are not documented, redesign the connection or ask a qualified person to evaluate it.
Step 5: Install and Secure the Correct Pin
For a screw-pin shackle, use the original matching pin and bring it fully into its seated position so the shoulder bears as intended against the shackle eye. Confirm that the threads engage smoothly and completely.
Do not leave the pin partly engaged, and do not apply a universal “back it off a quarter turn” rule; follow the instructions for the actual product. Position the assembly so that a moving rope, sling, hook, or nearby surface cannot rotate the pin loose during use. If that risk cannot be controlled, choose a connection and closure style approved for the service.
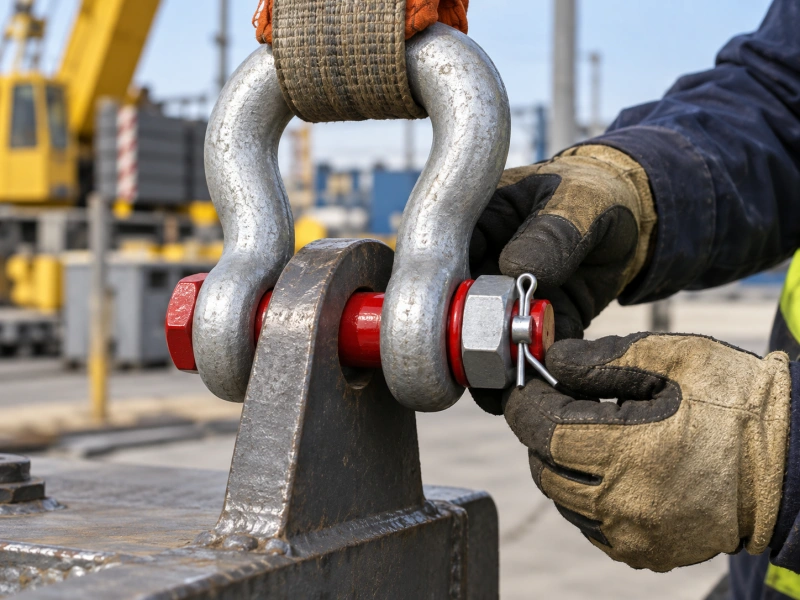
For a bolt-type shackle, install the matching bolt, nut, and retaining pin, or other specified retaining component, in the sequence given by the manufacturer. The nut alone is not a substitute for a missing retaining device. Verify that the pin is properly seated and that the retaining part is secure before applying load.
Do not replace a missing part with wire, a nail, or another field-made component unless the manufacturer’s procedure explicitly permits that exact method.
Step 6: Recheck the Complete Load Path
Before the lift, the rigging team should make a final check of the assembled connection: correct model and rating, sound condition, matching and fully secured pin, properly seated mating components, intended load direction, and sufficient clearance for the connection to move as planned.
Confirm that the hook, sling, lifting point, and shackle can all carry the calculated load in their actual configuration. The lowest applicable rating, or any restriction on use, governs the assembly.
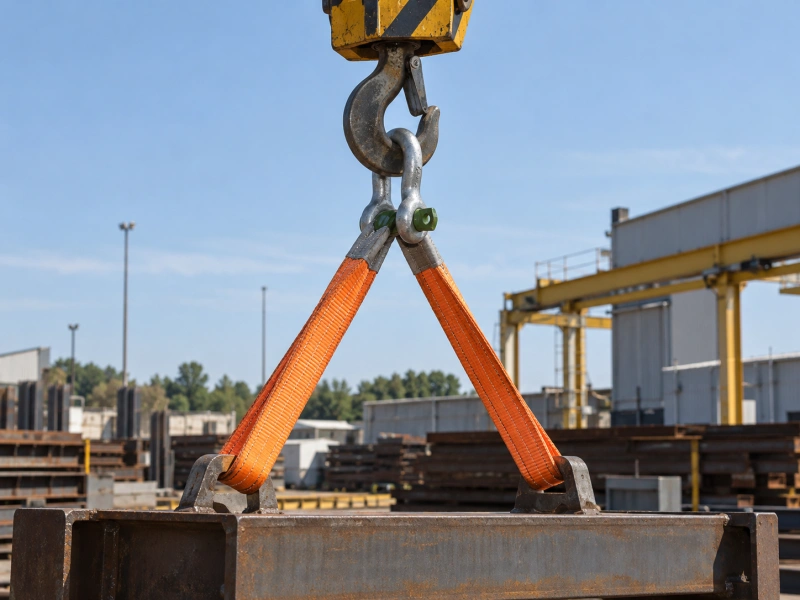
A controlled take-up may help reveal a connection that shifts, binds, or does not seat as planned, but it is not a substitute for proper selection, inspection, calculation, or the manufacturer’s limits. If the load path changes as tension is applied, stop and correct the arrangement.
Keep people out of the load path and away from pinch points and suspended loads. Apply load smoothly and avoid shock loading or sudden jerks that can create forces beyond those considered in the rigging plan.
Step 7: Unload, Remove, and Store the Shackle
Remove the shackle only after the load is fully supported and the connection is free of tension. Keep the pin with its matching body. If the pin has become difficult to remove, do not strike or force the shackle while a load remains on it; follow the site’s safe-isolation and inspection procedure.
After use, remove contamination as appropriate for the product, check for newly visible damage, and store the shackle so that its markings, pin, and retaining parts remain protected and easy to identify for the next use.
Loading Direction and Side Loading
Shackles are most straightforward to assess when the intended force remains in line with the body and pin arrangement shown in the manufacturer’s instructions. Side loading, an off-center pull, or a component that rolls across the pin can change how the hardware is stressed.
A bow shackle may be permitted to take certain side loads only when the manufacturer provides an approved configuration and a corresponding reduced rating. Do not apply another brand’s percentage chart to a Powerful Machinery shackle or assume that every bow shackle has the same allowance. A Dee shackle is generally selected for a straight-line connection and should not be treated as a side-loading solution.
If the load direction cannot be controlled, the solution may be a different shackle, a different connection point, or a redesigned rigging arrangement. The same applies when several components cause the shackle to twist or when a fitting bears only on the edge of the pin. Ask the supplier for the exact model’s loading guidance, and have a qualified person review any nonstandard geometry before approving it for service.
Common Mistakes to Avoid
The first mistake is selecting by size alone. Nominal size helps identify a shackle, but WLL, pin style, bearing dimensions, and approved loading conditions determine whether it suits the job. The second is using a pin that seems close enough. A shackle body and its pin form one matched assembly; a substituted pin can invalidate the selection.
The third is accepting poor fit simply because the connection can be assembled with force. Binding or edge loading may become more severe after tension is applied.
Another mistake is treating the bow shape as permission for unrestricted loading in any direction. Even where side loading is allowed, it may require a reduced WLL and an arrangement specified by the manufacturer.
Leaving a screw pin where movement can unwind it is also a known hazard, as is fitting a bolt-type shackle without its required retaining part. Finally, do not continue using a damaged or unidentifiable shackle because it “held last time.” Previous use is not evidence that the next lift is within the product’s rating.
FAQ
Can a Screw-Pin Shackle Be Used for Lifting?
Yes, if the exact shackle is rated and approved for the proposed lifting arrangement, the pin is fully seated, and the connection cannot rotate or move in a way that loosens the pin. The convenience of a screw pin does not make every screw-pin shackle suitable for every lift. Check the product marking, current instructions, and site requirements.
Should I Back Off the Pin After Tightening It?
Do not follow a generic back-off rule. The pin must be installed and seated as specified by the shackle manufacturer. A partly engaged pin is a serious problem, and unnecessary loosening can create another one. If the correct installation is unclear, obtain the model’s instructions before use.
Can I Put Two Sling Legs in One Bow Shackle?
Only when the exact shackle, sling arrangement, angles, fit, and resulting load are approved. A bow body often provides more room than a Dee body, but room alone does not establish capacity or acceptable bearing. Have the rigging configuration checked as a whole rather than applying a simple rule based only on the shackle’s shape.
How Often Should Shackles Be Inspected?
Check each shackle before use in accordance with the site procedure, and arrange competent periodic inspection at an interval based on applicable rules, manufacturer instructions, service severity, and the workplace inspection plan. More severe service may require closer attention. Remove an item from service when its condition or identification is uncertain; do not wait for the next scheduled inspection.
Can the Same Shackle Be Used for Lifting and Towing?
Do not assume so. Lifting and towing can impose different load directions and dynamic forces, and approval for one use does not automatically cover the other. Confirm both applications, the relevant ratings, and any restrictions in the exact model’s documentation. If the product is not clearly approved for the intended work, select a product that is.
What to Specify When Buying Shackles?
A useful shackle enquiry contains more than a nominal size. State whether the application is lifting or another service, the calculated load at the connection, expected load direction, body and pin style, mating-component dimensions, operating environment, quantity, and destination market.
Include any project standard, marking, material, finish, traceability, test report, or inspection document requirements. Ask which documents are available for the exact model and order scope instead of assuming that every catalogue item carries the same certificates.
You can browse the Powerful Machinery shackle range to identify likely styles. For a specific screw-pin bow model, the G-209 anchor shackle product page provides a dimensional table to discuss with your team; confirm the current specification before purchase.
If you send a drawing or clear photographs of the mating components along with the load arrangement, it is easier to check fit and narrow the selection. When the details are ready, contact our team about your shackle requirements so the proposed product can be reviewed against the actual application.