If you want to know how to install an eye bolt in the ceiling for maximum strength, you need the right tools and a certified eyebolt. Start by picking a product that meets strict standards, like Powerful Machinery’s eye bolts.
Certified options keep your projects safe and secure. Check that your eyebolt meets standards such as ASTM A193 Grade B7, Grade B8, or has a 3.1 Certification:
Standard | Description |
|---|---|
ASTM A193 Grade B7 | High strength for heavy-duty jobs |
ASTM A193 Grade B8 | Corrosion resistance for outdoor or marine use |
3.1 Certification | Each bolt is tested for quality and performance |
Choose quality, follow each step, and trust your installation.
Key Takeaways
Choose certified eye bolts for safety. Look for standards like ASTM A193 to ensure strength and reliability.
Always locate a solid ceiling joist or beam before installation. This provides a strong anchor point for your eye bolt.
Select the right size and type of eye bolt based on the load you need to support. Check load ratings to avoid overloading.
Follow the proper installation steps carefully. Ensure the shoulder of the eye bolt sits flush and engage at least 90% of the threads.
Regularly inspect your eye bolts for wear or damage. This helps maintain safety and performance over time.
Select Eye Bolt & Location
Powerful Machinery Eye Bolts Overview
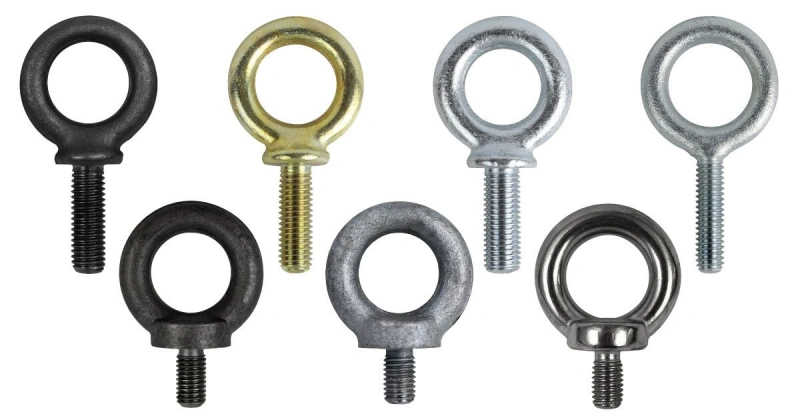
When you start your project, you want an eyebolt that stands up to the job. Powerful Machinery offers a range of stainless steel and carbon steel eyebolts, each designed for strength and reliability. Customers often mention how easy it is to work with these products.
Orders arrive on time, and the quality meets expectations every time. You can count on helpful advice and attention to detail from the team. These eyebolts resist corrosion, making them perfect for both indoor and outdoor use. You get peace of mind knowing your installation will last.
Find Ceiling Joist or Beam
Before you install anything, you need to find a solid spot in your ceiling. Always look for a joist or beam, not just drywall or plaster. Use a stud finder or tap gently until you hear a solid sound. This step matters because a strong anchor point keeps your load safe.
People use ceiling eyebolts for many things, like hanging light fixtures, shelves, or even supporting cable paths in commercial spaces. You might also see them holding up suspension wires for grid ceilings or providing seismic bracing. No matter the use, always pick a sturdy spot.
Tip: If you plan to hang something heavy, double-check the beam’s condition. Old or damaged wood can weaken your setup.
Check Load Ratings & Standards
Choosing the right eyebolt size and type makes all the difference. Look at the load ratings before you buy. Here’s a quick table to help you match the diameter to the weight you need to support:
Diameter | Straight Pull (lbs) | 45° Pull (Shoulder Only) (lbs) |
|---|---|---|
1/4″ | 500 | 125 |
5/16″ | 900 | 225 |
3/8″ | 1,300 | 325 |
7/16″ | 1,800 | 450 |
1/2″ | 2,400 | 600 |
9/16″ | 3,000 | 800 |
5/8″ | 4,000 | 1,000 |
3/4″ | 5,000 | 1,250 |
7/8″ | 7,000 | 1,750 |
1″ | 9,000 | 2,250 |
1-1/8″ | 12,000 | 3,000 |
1-1/4″ | 15,000 | 3,750 |
1-1/2″ | 21,000 | 5,250 |
1-3/4″ | 28,000 | 7,000 |
2″ | 38,000 | 9,500 |
2-1/2″ | 56,000 | 14,000 |
When you select an eyebolt, think about the environment. Stainless steel works best for damp or outdoor areas. Forged carbon steel gives you maximum strength for heavy-duty jobs. Always use shoulder eyebolts for angled loads and make sure the shoulder sits flush against the surface.
For the safest installation, ensure the threads engage at least 90% into the base material. Inspect your eyebolt before each use to catch any signs of wear or damage.
How to Install Eye Bolt in Ceiling?
Installing an eyebolt in your ceiling is a straightforward process, but you need to follow each step carefully to get maximum strength and safety. Let’s walk through how to install an eye bolt in the ceiling, from gathering your tools to tightening the last nut.
Prepare Tools & Materials
Before you start, make sure you have everything you need. The right tools and materials make the job easier and safer. Here’s a checklist to help you get ready:
Stainless steel or carbon steel eyebolt (Powerful Machinery offers certified options)
Eye lag screws for wood or metal framing
Anchors (choose based on your ceiling material)
Washers and nuts for even load distribution
Drill with the correct bit size for your anchor and eyebolt
Tape measure and laser level for accurate placement
Stud finder to locate ceiling joists or beams
Safety glasses, gloves, and a dust mask
Extension pole or driver adapter for hard-to-reach ceilings
Hanger wires, clips, or brackets if you need extra support
Tip: Always inspect your eyebolt before installation. Look for any signs of wear, rust, or damage. Using a certified product from Powerful Machinery ensures you start with a reliable component.
Drill Pilot Hole & Insert Anchor
The next step in how to install an eye bolt in the ceiling is to prepare the hole and anchor. The method changes depending on your ceiling material. Here’s a quick guide:
Material | Installation Steps |
|---|---|
Wood | Drill a pilot hole slightly smaller than the eyebolt’s shank. Use a wood bit. |
Concrete | Use a hammer drill and a masonry bit to create a hole for the anchor. Choose a sleeve or wedge anchor for heavy loads. |
For drywall or other materials, you’ll need the right anchor. Here’s a table to help you pick the best anchor for your project:
Anchor Type | Load Capacity | Installation Method | Best Application | Removable? |
|---|---|---|---|---|
Plastic Expansion Anchors | 10-25 lbs | Drill hole, insert anchor, drive screw | Picture frames, lightweight shelves | Yes |
Self-Drilling Drywall Anchors | 25-50 lbs | Drive directly with drill | Towel bars, light fixtures | Yes |
Toggle Bolts | 50-100+ lbs | Pre-drill hole, fold wings, insert | Heavy shelves, grab bars | No |
Snaptoggle Anchors | 100-265 lbs | Insert channel, snap off straps | Heavy cabinets, TV mounts | Yes |
Wedge Anchor | Very High | Drill, insert, tighten nut | Structural connections | No |
Sleeve Anchor | Medium-High | Drill, insert through fixture | Equipment, HVAC | Yes |
Tapcon Screw | Light-Medium | Drill hole, drive screw | Light fixtures | Yes |
Note: Always match your anchor to the weight and direction of your load. For vertical loads, plain bolts work well. For angled loads, use shoulder eyebolts. Stainless steel or galvanized bolts are best for outdoor or damp environments.
Install Eye Bolts Securely
Now you’re ready to install an eyebolt. This step is where you lock in strength and safety. Follow these steps for a secure fit:
Check the hole size. The eyebolt should fit snugly without forcing it.
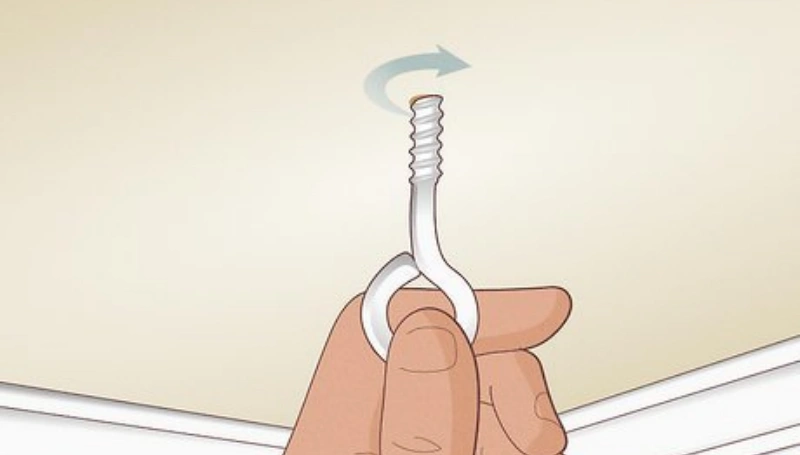
Insert the anchor if needed. For wood, you can screw an eyebolt directly into the pilot hole. For concrete or drywall, place the anchor first.
Make sure the shoulder of the eyebolt sits flush with the ceiling surface. Use washers or shims if needed, but keep at least 90% of the threads engaged.
Tighten the nut or bolt securely. You want 1 to 1.5 threads showing past the nut for the best grip.
Always apply the load in the plane of the eye. This keeps the eyebolt strong and reduces bending.
For blind tapped holes, aim for thread engagement that’s at least 1.5 times the bolt diameter in steel, or 2.5 times in aluminum.
Install the shoulder at a right angle to the hole’s axis. This gives you full contact and maximum strength.
🛡️ Safety First: Wear your safety glasses and gloves. Keep loads vertical and below 45 degrees. Use washers to spread the load evenly. Regularly inspect your installation for signs of wear or damage.
If you follow these steps, you’ll install an eyebolt that’s ready for heavy-duty use. Powerful Machinery’s certified products make the process even more reliable.
Remember, how to install an eye bolt in the ceiling is all about careful preparation, the right materials, and attention to detail. When you install an eyebolt the right way, you get strength and peace of mind for years to come.
Safety & Durability Tips
Avoid Common Mistakes
You want your ceiling installation to last, so it’s important to avoid common mistakes. Many people forget to check for damage before installing an eyebolt. If you see any bending, stretching, or cracks, don’t use it. Even small nicks or worn threads can weaken the bolt.
Never install an eyebolt into drywall without the right anchor. Always make sure the shoulder sits flush with the ceiling. If you skip these steps, you risk a weak connection that could fail under load.
Tip: Environmental factors like moisture or heat can cause corrosion or make steel brittle. Always choose the right material for your space.
Inspect & Maintain Eye Bolts
Regular inspection keeps your setup safe. High-risk areas, like gyms or industrial spaces, need checks every six months. For medium-risk spots, inspect at least once a year. Low-risk areas, such as home storage, may only need a check every two years.
When you inspect, look for these warning signs:
Elongated or curved eye section
Bent or stretched shank
Nicks, gouges, or significant wear
Polished, cut, or heated areas
Worn or corroded threads
Cracks or missing identification marks
If you spot any of these, remove the eyebolt right away. Don’t try to repair or reuse damaged bolts. Neglecting these checks can lead to serious accidents or injuries.
Use Certified Products for Reliability
Certified products give you peace of mind. They come with clear markings, rated loads, and manufacturer information. Here’s what to look for:
Requirement | Description |
|---|---|
Manufacturer Marking | Name or trademark on the eyebolt |
Rated Load | Maximum working load is clearly indicated |
Grade | Grade specified for alloy eyebolts |
Routine inspections and certified products help you avoid costly mistakes. Governing bodies like OSHA and ANSI require annual checks and may conduct audits. By following these tips, you keep your ceiling installation strong and safe for years.
Install an Eyebolt for Heavy Loads
Distribute Load Across Beams
When you want to hang heavy objects from your ceiling, you need to think about how the weight spreads across the structure. Start by finding strong beams or joists. If you place your eyebolt directly into a single beam, you get the most support.
For extra safety, you can use a mounting plate or bracket that connects to more than one beam. This method helps distribute the load and reduces stress on any single point. Always check the condition of the beams before you begin. If you see cracks or signs of weakness, pick another spot.
Lifting eye bolts work best for heavy-duty jobs. They support much higher loads than wire eye bolts.
Shoulder pattern eye bolts have a metal platform that boosts strength, especially when you need to lift at an angle.
Remember, the rated capacity drops if you pull at an angle. Always check the load rating for non-axial loads.
Use Washers & Bolts for Stability
You want your installation to stay secure over time. Washers and bolts play a big role in keeping everything stable. Place a steel washer between the eyebolt and the ceiling surface. This helps the eyebolt sit flush and spreads the force evenly. If the surface is uneven, use a spacer or shim to line things up.
Tighten the bolt so the shoulder sits flat against the ceiling. This step makes sure the load gets distributed properly and keeps the eyebolt from shifting.
Washers and bolts help align the eyebolt with the direction of the load.
Steel washers or spacers add stability and prevent movement.
The shoulder must sit flush for safe lifting. Washers or shims can help you get the right fit.
Powerful Machinery Product Benefits
When you choose Powerful Machinery products, you get certified strength and reliability. Their stainless steel eyebolts resist corrosion and handle tough environments. You can trust the load ratings because each eyebolt meets strict international standards.
The precision engineering means you get a perfect fit every time. Customers say these products last longer and perform better, even in demanding jobs. If you want peace of mind for your ceiling installation, Powerful Machinery gives you the confidence to hang heavy objects safely.
Conclusion
You now know how to install an eye bolt in your ceiling for maximum strength. Start with the right tools and certified products from Powerful Machinery. Always check your installation and inspect for wear. For long-term durability, choose SS316 stainless steel eye bolts. These offer:
Excellent corrosion resistance
Reliable performance in harsh settings
Structural integrity that lasts
Safe handling of heavy loads
Stay safe and trust certified hardware for every project.
FAQ
How do you know if your ceiling can support an eye bolt?
You need to find a solid joist or beam. Use a stud finder or tap the ceiling until you hear a solid sound. Never install an eye bolt in just drywall. Always check the wood for damage before you start.
What size drill bit should you use for an eye bolt?
Check the diameter of your eye bolt’s shank. Use a drill bit that is slightly smaller than the shank for wood. For anchors, follow the anchor manufacturer’s instructions. This helps you get a snug, secure fit.
Can you use Powerful Machinery eye bolts outdoors?
Yes! Powerful Machinery’s stainless steel eye bolts resist rust and corrosion. You can use them for outdoor projects, marine jobs, or anywhere moisture is a concern. They hold up well in tough weather.
How often should you inspect ceiling eye bolts?
You should check eye bolts every six months in high-use areas. For home or light-duty use, inspect them once a year. Look for signs of wear, rust, or bending. Replace any damaged bolts right away.