You can mount an electric hoist by selecting certified equipment, inspecting your overhead support, and following a precise electric hoist installation process. Safety remains essential throughout each step. Choose a Powerful Machinery Electric Hoist for proven reliability and certification.
Evaluate your mounting options and verify compliance with local safety codes before installation. If you encounter uncertainty or complex requirements, consult a professional to ensure proper setup and long-term performance.
Key Takeaways
Choose a certified electric hoist that meets your lifting needs and local safety codes to ensure reliability and compliance.
Inspect your overhead support structure thoroughly before installation to guarantee it can handle the hoist’s weight and operational loads.
Follow a detailed step-by-step installation process, including securing the hoist, connecting power, and integrating safety devices for safe operation.
Perform regular inspections and maintenance on your electric hoist to prevent breakdowns and extend its lifespan.
Consult a professional for complex installations or if you encounter any issues during setup to ensure safety and compliance.
Electric Hoist Installation Basics
What Is an Electric Hoist?
You use an electric hoist machine to lift and move heavy loads in industrial, commercial, and construction environments. This device relies on a motor to raise objects, making electric hoist installation a practical solution for handling materials safely and efficiently.
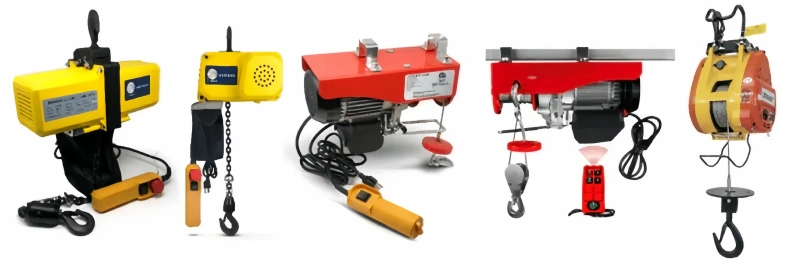
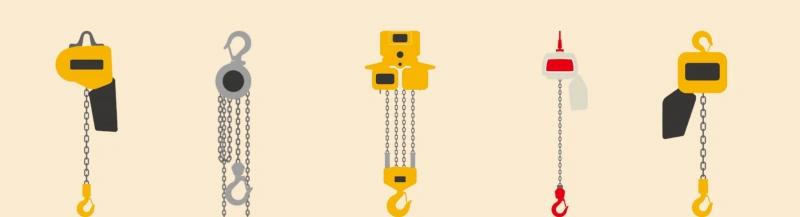
You find several types of electric hoist machines in the market.
Electric chain hoists operate quietly and require little maintenance.
Electric wire rope hoists lift heavier loads at greater heights.
Monorail hoists move along a fixed track, ideal for transporting materials.
Double girder hoists provide extra support for large loads.
Pneumatic hoists use air power, suitable for outdoor settings.
Custom fabrications address unique industrial needs.
You select the electric hoist machine that fits your lifting requirements and installation site.
Benefits of Installing an Electric Hoist
Electric hoist installation offers clear advantages over manual lifting.
You experience predictable cycle times, which improve workflow and reduce downtime.
You reduce operator fatigue, allowing your team to work longer with less physical strain.
You gain improved control over load positioning, minimizing errors and rework.
An electric hoist machine increases productivity and safety in your workplace. You rely on these benefits to streamline operations and protect your staff.
Why Choose a Powerful Machinery Electric Hoist?
Powerful Machinery stands out as a trusted leader in electric hoist installation. You benefit from products that meet international certifications, including ISO9001, TUV Rheinland, and OSHA. The electric hoist machine from Powerful Machinery delivers strength, reliability, and safety.
You find high-tensile lifting chains, wire ropes, and custom-engineered solutions that fit your project needs.
You choose Powerful Machinery for electric hoist installation because the brand offers proven performance and global recognition. You ensure your lifting operations meet the highest standards with every electric hoist machine.
Equipment Selection for Electric Hoist Installation
Choose the Right Hoist
You must choose the right hoist for your specific lifting needs. Start by identifying the type of load you plan to move and the environment where you will operate the hoist. Consider factors such as rated load capacity, lift height, available power supply, suspension type, duty cycle, and safety features.
Look for hoists with overload protection and emergency stop functions. Evaluate environmental conditions like temperature, humidity, and exposure to dust or corrosive substances.
Powerful Machinery offers a range of electric hoists designed for various applications, ensuring you find a model that matches your requirements.
Rated load capacity
Lift height
Power supply compatibility
Suspension type
Duty cycle
Safety features
Environmental considerations
Weight Capacity & Lifting Height
You must select a hoist with a weight capacity that exceeds the heaviest load you expect to lift. Industry guidelines recommend choosing a hoist rated at least 25% higher than your maximum load. Make sure the average load does not exceed 65% of the hoist’s rated capacity.
In warehouse environments, hoists often feature capacities like 1320 lbs (600 kg) and lifting heights up to 40 ft (12 m). Duty classifications such as H2, H3, or H4 help you match the hoist to the demands of your job.
Lifting Capacity | Lifting Height |
|---|---|
1320 lbs / 600 kg | 40 ft / 12 m |
Power & Compatibility
You need to check the compatibility of the electric hoist with your existing power source. Review the voltage, phase, and frequency requirements to avoid equipment damage and ensure efficient operation. Most electric hoists require three-phase power for optimal performance.
Parameter | Description |
|---|---|
Voltage | Match the hoist’s motor specifications to your facility’s electrical potential difference. |
Phase | Three-phase power is standard for electric hoists. |
Frequency | Ensure the rate of AC cycles aligns with the motor’s design. |
Certified Quality Standards
You should always select electric hoists that meet recognized industry standards. Certifications like ASME B30.16 and ASME B30.21 guarantee quality and safety for powered hoists. Frequent and periodic inspections are required by OSHA and ASME.
Proper training for pre-operational inspections ensures compliance and safe operation. Powerful Machinery electric hoists carry certifications that reflect their commitment to safety and reliability.
Tip: Certified products from Powerful Machinery provide peace of mind and help you meet regulatory requirements in demanding environments.
Preparing for Electric Hoist Installation
Assess Overhead Support
Before you begin the installation method, you need to prepare the mounting location by evaluating the strength and stability of your overhead support. The foundation must support both the weight of the electric hoist and the operational loads during lifting. You should look for the following structural requirements:
The foundation design and load-bearing capacity must handle the crane’s weight and distribute loads evenly, considering soil conditions.
Beams and girders should use strong materials and provide enough span length and torsion resistance for safe operation.
Crane rails must be high-strength, securely fixed, and properly aligned for smooth movement.
All components must comply with safety standards, including limit switches and overload protection.
Tip: Always consult a structural engineer if you have doubts about the load-bearing capacity of your beams or ceiling.
Reinforce Beams or Ceiling
You may need to reinforce beams or the ceiling before mounting your electric hoist. Use a lifting beam with four intermediate cross members for added support. Anchor each cross member to the concrete ceiling using four-bolt anchors.
This approach spreads the lifting loads across a larger area of the slab, reducing stress on any single point. For extra security, use M24 resin anchors with the correct embedment depth into the reinforced concrete slab. This reinforcement ensures your hoist remains stable and safe during operation.
Check All Components
A thorough check and preparation before installation ensures safety and reliability. Follow this checklist:
Disconnect the hoist from its power source before starting any work.
Secure the hoist and load to prevent movement.
Replace or repair any worn components, such as motors, chains, brakes, wiring, or gears, according to manufacturer guidelines.
Reassemble the hoist, making sure all connections are tight and covers are in place.
Test the hoist with a light load to check alignment, smooth operation, and brake function.
Reconnect power and perform a full operational test, including limit switches and emergency stops.
Record all actions in your maintenance logbook.
By following these steps, you set the stage for a safe and efficient electric hoist installation.
Mounting Options for Installing an Electric Hoist
When you plan your electric hoist installation, you must select the right mounting method for your workspace and lifting needs. Each option offers unique advantages for safety, efficiency, and flexibility.
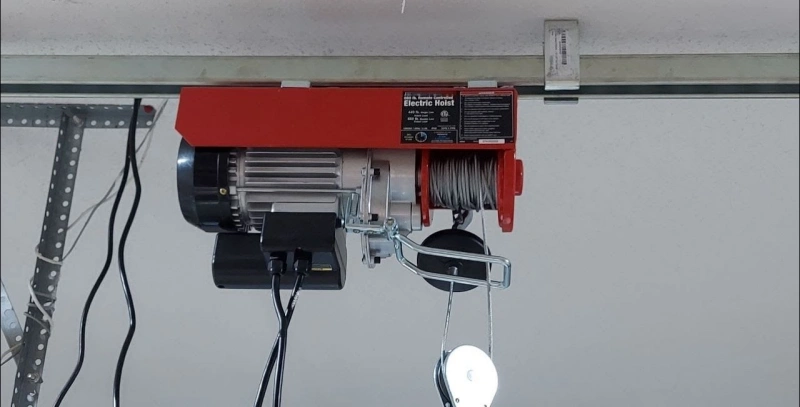
Mount the Electric Hoist to the Ceiling
You can mount the hoist directly to the ceiling when you need a fixed lifting point. This method works well in workshops, garages, or warehouses with strong overhead support.
Use a hook mount for quick attachment to a secure anchor point. For a more permanent setup, choose a lug mount, which bolts the hoist directly to the structure. This reduces wear on the hoist frame and provides a stable connection.
Tip: Always verify that your ceiling or beam can support the full rated capacity of your electric hoist before mounting.
Electric Chain Hoist on I-Beam
Many industrial settings use an I-beam for mounting. This approach allows you to move the hoist along the beam for greater reach and flexibility. Follow these steps to mount the hoist on an I-beam:
Prepare the installation site. Inspect the I-beam for defects and confirm it can handle the hoist’s rated load.
Mount the hoist beneath the load path. Align and secure all attachments.
Connect electrical power using the manufacturer’s wiring diagram.
Test all controls and safety devices.
Perform a load test to confirm safe operation.
Train operators set a maintenance schedule.
Trolley mounting is common for this setup, as it lets you move heavy loads efficiently across the workspace.
Install Mounting Brackets
Mounting brackets provide a secure and adaptable solution for many installations. You must follow best practices to ensure safety and performance:
Secure the hoist firmly according to the manufacturer’s instructions.
Check that all mounting hardware is tight and properly aligned.
Confirm the hoist is stable to prevent damage or injury during use.
Proper mounting of brackets ensures your electric hoist operates reliably and safely in demanding environments.
How to Mount an Electric Hoist: Step-by-Step Guide
Installing an electric hoist requires careful attention to detail and strict adherence to safety protocols. This step-by-step guide helps you achieve a secure and efficient installation, ensuring reliable performance and compliance with industry standards.
Unpack and Inspect Parts
Begin by unpacking the electric hoist and all included components. Inspect each part for visible damage or defects. Check the chain or wire rope, hooks, mounting brackets, and electrical connections. Make sure you have the correct model and all necessary accessories.
If you notice any issues, contact the manufacturer before proceeding. You protect your investment and ensure safety by verifying the integrity of every component.
Tip: Always wear personal protective equipment (PPE) during unpacking and inspection. Conduct a safety briefing with your team before starting the installation.
Assemble and Position Hoist
Follow these steps to assemble and position the electric hoist:
Position the trolley on the beam or track. You may need to partially disassemble the trolley to fit it onto the beam, then reassemble it in place.
Check the alignment of the trolley. Confirm that the wheels sit correctly on the track for smooth movement.
Select proper fixation points on a sturdy overhead beam or support structure. The support must bear the maximum load capacity of the electric hoist.
Use the tools and hardware specified by Powerful Machinery. Ensure all components are rated for the weight and stress they will endure.
Consider environmental factors such as humidity, temperature, and dust. Assess the need for additional protective measures.
You create a stable foundation for installing an electric hoist by following these steps.
Secure the Hoist to the Bracket
Attach the electric hoist securely to the mounting bracket. Tighten all bolts and fasteners according to the manufacturer’s instructions. Verify that the hoist is stable and does not shift under load. Use high-strength anchors and mounting hardware to prevent movement during operation.
Confirm the structural integrity of the mounting surface before you install the electric hoist.
Note: Proper fixation prevents accidents and ensures long-term reliability.
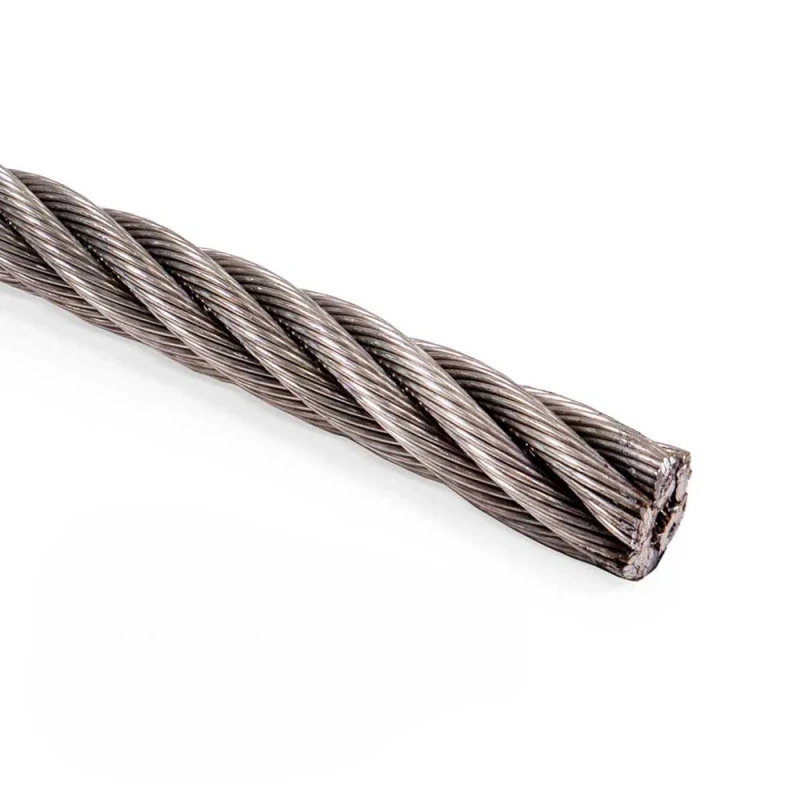
Install Wire Rope or Chain
To install the chain or rope, follow this process:
Complete the mechanical assembly by reeving the wire rope or chain through the hoist mechanism.
Secure the dead end of the wire rope to an anchor point using a wedge socket or rope clips. Maintain proper orientation and spacing of clips to preserve strength.
Attach the hook to the support structure. Make sure it locks in place and can handle the rated load.
Inspect the installation site for accessibility and strong support.
You ensure safe lifting operations by installing an electric hoist with a properly secured wire rope or chain.
Connect Power and Controls
Connect the power supply to the electric hoist. Use electrical cables and connectors rated for the voltage, current, and phase specifications required by the hoist. Secure all electrical connections tightly to prevent hazards. Properly ground the hoist and trolley system to avoid electrical risks.
Install the control pendant or remote control system, ensuring strain relief to prevent disconnection during operation. Engage a qualified electrician to handle all electrical connections and comply with local codes.
Tip: Adjust the limit switches to prevent over-travel and test the brake system and controls for correct function.
Add Safety Devices
Integrate essential safety devices during installation. The following table outlines key safety features:
Safety Device | Description |
|---|---|
Motor brake | Engages immediately under full load when power is cut off. |
Hook and safety latch | High-strength steel hook with a safety latch to prevent accidental release during operation. |
Phase protection relay | Protects the motor from damage due to incorrect power supply phase connections. |
Reverse-phase protection device | Automatically controls the circuit to prevent motor damage from incorrect power supply connections. |
Limit switch | Cuts off power when lifting or lowering exceeds set limits, ensuring safe operation. |
Emergency stop button switch | Stops the hoist in emergencies; features a locking mechanism to prevent accidental restart. |
You enhance operational safety by installing an electric hoist with these devices.
Lubricate and Final Check
Before you use the electric hoist, perform these final steps:
Lubricate the load chain regularly to prevent friction, wear, and corrosion. Use the lubricant recommended by Powerful Machinery and apply it according to their guidelines.
Test limit switches to ensure they stop the hoist at the correct positions.
Check the brake for proper engagement.
Inspect all electrical connections and wiring for wear or loose connections.
You complete the installation process by conducting a thorough final check. This step-by-step guide ensures you install the electric hoist safely and efficiently, maximizing performance and longevity.
Safety and Code Compliance in Electric Hoist Installation
Follow Electrical Codes
You must follow local electrical codes when installing an electric hoist in your garage or commercial facility. The National Electrical Code (NEC) Article 610.61 introduces new grounding requirements for overhead crane electrification systems.
NEC Article 555 addresses safety measures for electrical installations in marine environments, including GFCI protection for personnel at docking facilities. These codes help you maintain safety and prevent electrical hazards. Always check the latest safety regulations before starting your installation.
Tip: Consult a licensed electrician to verify compliance with local electrical codes and ensure your garage meets all requirements.
Grounding and Safety Wires
Proper grounding protects you from electrical shocks and equipment damage. OSHA 1910.179 outlines specific grounding requirements for electric hoist installations. NEC Article 610 provides guidelines for installing and grounding conductor bar systems.
You must use a separate bonding conductor for safety. Reliable grounding ensures your garage remains safe during operation and reduces the risk of electrical faults.
Install Buffers and Safety Ropes
Buffers and safety ropes play a critical role in electric hoist safety. You need to follow the crane manufacturer’s recommendations for hoisting ropes. The rated load divided by the number of rope parts should not exceed 20% of the rope’s nominal breaking strength.
At least two wraps of rope must remain on the drum when the hook is at its lowest position. Secure the rope end to the drum or use an approved socket arrangement. Retighten all nuts on clip bolts after one hour of operation.
Use ropes with temperature-resistant cores in high-temperature garage environments. Replacement ropes must match the original size, grade, and construction.
Guideline | Description |
|---|---|
Rope Securing | Keep two wraps on the drum at the lowest hook position |
Clip Attachment | U-bolts on dead end, follow spacing recommendations |
Retightening Clips | Retighten nuts after one hour of operation |
Temperature Resistance | Use ropes with temperature-damage-resistant cores in high-temperature areas |
Pre-Use Safety Checks
You must perform essential pre-use safety checks before operating your electric hoist in the garage. Inspect markings and labels for identification and capacity information. Check controls for proper labeling and functionality. Examine the hook for deformation, wear, corrosion, and secure latches.
Inspect the chain for wear, gouges, nicks, and proper lubrication. Test upper and lower limits, listen for abnormal noises, and ensure limit switches function. Daily appearance inspection of the hoist housing for damage is necessary. Inspect the wire rope for broken wires, wear, and rust.
Check the brake for wear and functionality. Inspect the electrical system, including the power cord and control buttons. Ensure the grounding device is reliable.
Safety checks protect you and your equipment. Never skip these steps in your garage or any installation site.
Testing and Maintenance After Installing an Electric Hoist
Light Load Test
You start by performing a light load test to verify the electric hoist’s basic functions. Follow these steps:
Set up a mobile test laboratory with instruments to measure electrical parameters.
Monitor and record the hoist motor’s armature current, armature voltage, field current, and motor speed.
Study the hoist’s electrical prints to identify any control malfunctions and create a test procedure.
Begin with a minimal load and conduct emergency stop tests while lowering the load.
Calculate the actual braking capacity after each speed and load test using mechanical parameters specific to the hoist.
This process helps you test the hoist safely before moving heavier loads.
Full Load Test
You must test the hoist under its rated capacity to confirm performance and safety. Use this procedure:
Complete a trial run with the hoist empty.
Attach the test load securely and check rigging.
Lift the load to verify stability and hold it for a functional check.
Maneuver the load to test control response.
Lower and unhook the load safely.
Start with a light load (20-30% of rated capacity), then increase to 50%, 75%, and finally 100%, checking for issues at each stage.
You ensure the hoist operates within allowed limits and meets safety standards.
Routine Maintenance Tips
You need to inspect and maintain your electric hoist regularly to prevent breakdowns and extend its lifespan. Clean the hoist and lubricate moving parts according to manufacturer guidelines.
Check for wear on chains, ropes, and hooks. Tighten bolts and inspect electrical connections. Record all maintenance actions in a logbook. Schedule periodic checks to keep the hoist in optimal condition.
Tip: Consistent maintenance tips help you avoid unexpected failures and keep your lifting operations safe.
Troubleshooting
You address common issues by following a systematic troubleshooting approach. If the hoist fails to lift, check the power supply and control buttons. Inspect the chain or wire rope for damage. Listen for unusual noises that may indicate mechanical problems.
Review the brake system and limit switches. Consult the manufacturer’s manual for specific solutions. Quick troubleshooting ensures minimal downtime and safe operation.
When to Call a Professional for Electric Hoist Installation?
Mounting an electric hoist often requires specialized skills and knowledge. You must recognize situations where expert assistance ensures safety and compliance. Knowing when to call a professional protects your equipment and prevents costly mistakes.
Signs You Need Expert Help
You may notice warning signs during installation or operation. These signs indicate the need for professional intervention. Review the table below to understand common trouble indicators:
Sign of Trouble | Implication |
|---|---|
Unusual noises during operation | Indicates potential mechanical issues |
Visible wear on chains or hooks | Suggests the need for replacement or repair |
Reduced lifting speed | May point to motor or power supply problems |
Malfunctioning safety features | Critical for safe operation; requires immediate attention |
If you observe any of these issues, you should stop using the hoist and consult a specialist. Ignoring these signs can lead to equipment failure or injury.
Tip: Always document any abnormal behavior or damage. This record helps professionals diagnose problems quickly.
Electrical and Code Issues
You must address electrical and code compliance with care. If you lack experience with wiring or local regulations, you risk unsafe installation. A qualified electrician ensures proper grounding, correct voltage, and adherence to safety codes.
You avoid hazards such as electrical shocks, fire, or code violations by relying on certified expertise.
Note: Electrical work often requires permits and inspections. Professionals handle these requirements efficiently.
Complex Installations
Some installations involve unique challenges. You may need to mount the hoist in a confined space, integrate it with existing systems, or handle heavy-duty loads. Complex projects demand advanced tools and knowledge.
Professionals assess structural integrity, select appropriate mounting hardware, and verify compatibility with your facility. You gain peace of mind knowing your electric hoist operates safely and meets industry standards.
Callout: When your project involves custom engineering or high-capacity lifting, professional support guarantees optimal performance.
Conclusion
You ensure a safe and efficient workspace when you follow each step for electric hoist installation. Always select a certified electric hoist from Powerful Machinery to guarantee reliability and compliance. You protect your team by checking every electric hoist component and following all safety codes.
If you face challenges, seek professional support for your electric hoist setup. You maintain peak performance with regular electric hoist inspections and maintenance. Explore Powerful Machinery’s electric hoist solutions for dependable lifting in any industry. Your next project deserves a trusted electric hoist.
FAQ
How often should you inspect your electric hoist?
You should inspect your electric hoist before each use. Schedule a thorough inspection every three months. Look for wear, damage, or malfunction. Regular checks help you maintain safety and extend the lifespan of your Powerful Machinery electric hoist.
Can you install an electric hoist outdoors?
Yes, you can install many electric hoists outdoors. Always check the model’s weather resistance rating. Use weatherproof enclosures and follow manufacturer guidelines. Powerful Machinery offers models suitable for outdoor environments.
What should you do if your hoist stops working suddenly?
First, disconnect the power. Inspect the power supply, control buttons, and wiring. Check for overload or tripped safety devices. If you cannot identify the issue, contact a qualified technician or Powerful Machinery support.
Do you need special training to operate an electric hoist?
Yes, you need proper training. Learn safe operation, emergency procedures, and daily inspection routines. Training reduces risks and ensures compliance with workplace safety standards.
Where can you find certified replacement parts for your hoist?
You can order certified replacement parts directly from Powerful Machinery or authorized distributors. Always use genuine parts to maintain safety and performance.