A turnbuckle tightens a wire rope, cable, or tension rod by shortening the distance between its two end fittings. The body contains opposite threads—right-hand on one side and left-hand on the other—so rotating the body moves both ends at the same time.
The important part is not simply “turn it clockwise.” The tightening direction depends on how you are viewing the assembly. Rotate the turnbuckle body in the direction that draws both end fittings inward and shortens the overall assembly. If the assembly gets longer, reverse the direction.
For a safe, reliable adjustment, keep the turnbuckle aligned with the load, maintain proper thread engagement, increase tension gradually, and secure the adjustment so the body cannot unscrew in service.
Key Takeaways
- Tighten a turnbuckle by rotating the body so both threaded end fittings move inward.
- Do not rely on a universal clockwise/counterclockwise rule; watch the end fittings and assembly length.
- Keep the turnbuckle in a straight, in-line pull. Side loading can bend the body or overload the end fittings.
- Do not use a generic torque value to decide when the turnbuckle is “tight enough.” The required tension comes from the cable, structure, or equipment specification.
- After tensioning, use the locking method designed for the turnbuckle, such as compatible lock nuts or lock wire, and recheck the complete assembly.
How Does Tightening a Turnbuckle Work?
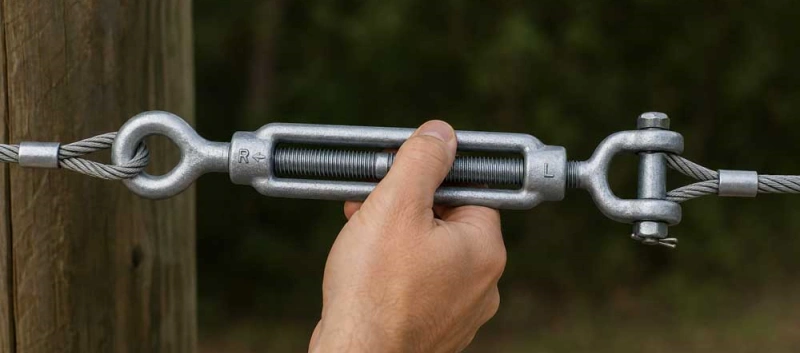
A standard turnbuckle has a central body and two threaded end fittings. One end uses a right-hand thread and the other uses a left-hand thread. Because the threads run in opposite directions, rotating the body changes the effective length of the assembly without disconnecting either end.
When both end fittings move toward the body, the assembly becomes shorter and tension increases. When they move away from the body, the assembly becomes longer and tension decreases.
This is why a turnbuckle works well as a cable tensioner: one controlled rotation adjusts both ends at once. For a more detailed explanation of the mechanism, see our guide to how a turnbuckle works.
Before You Tighten a Turnbuckle
A few checks before adjustment prevent most installation problems.
| What to check | Why it matters |
| Turnbuckle rating and size | The hardware must be suitable for the expected load and application. |
| Body and end fittings | Bent, cracked, heavily corroded, or damaged parts should not be put into service. |
| Threads | Threads should be clean, compatible, and free from obvious deformation or galling. |
| Thread engagement | Both end fittings must remain sufficiently engaged in the body according to the manufacturer’s instructions. |
| Alignment | The turnbuckle should be loaded in a straight line, not pulled from the side. |
| Pins and retaining hardware | Jaw ends must have their clevis pins and retainers correctly installed. |
| Cable or wire rope termination | The line must terminate in hardware that is compatible with the turnbuckle end fitting. |
| Take-up range | The turnbuckle needs enough remaining adjustment to reach the required tension without running out of travel. |
If you are unsure whether the hardware is still serviceable, inspect it before applying tension. Our turnbuckle inspection guide covers the main conditions to check. If the problem is product selection rather than adjustment, review turnbuckle sizes and end-fitting options before continuing.
Tools
For most industrial turnbuckles, use the correctly sized wrench on the body’s wrench flats when flats are provided. A second wrench may be useful to keep a compatible terminal or fitting from rotating.
Depending on the system, you may also need:
- gloves and eye protection;
- a cable or wire-rope tension gauge when the installation has a specified target tension;
- tools required for the cable termination or jaw pins;
- the manufacturer’s product data or system tension specification.
Avoid forcing a turnbuckle with a hammer, cheater bar, or improvised tool. If the body binds or requires abnormal force, stop and find the cause instead of applying more leverage.
How to Tighten a Turnbuckle: Step by Step Guide
Step 1: Stabilize the System and Inspect the Hardware
Before making an adjustment, make sure the assembly is stable and that you can work without exposing people to a tensioned line. Keep clear of the direct line of pull.
Inspect the turnbuckle, end fittings, anchors, cable or wire rope, and connecting hardware. Look for distortion, significant corrosion, damaged threads, cracked components, missing retaining hardware, or anything else that could affect the load path.
Do not try to “tighten through” a damaged, side-loaded, or seized turnbuckle. Correct the condition first.
Step 2: Set the Turnbuckle for Useful Take-Up
Before connecting the assembly, open the turnbuckle enough to leave useful tightening travel. Do not back the end fittings out so far that thread engagement becomes inadequate.
Try to begin with similar thread engagement on both ends. This gives you a more balanced adjustment range and makes it easier to see if one fitting is approaching the end of its safe travel.
There is no universal number of exposed threads that applies to every turnbuckle. Follow the product manufacturer’s requirements for minimum thread engagement. If the available take-up is too short for the installation, select a different turnbuckle length or size rather than operating at the edge of the threads.
Step 3: Attach Both Ends in a Straight Line
Connect each end fitting to a compatible anchor, terminal, shackle, eye, or other specified connection. The turnbuckle should sit in line with the direction of tension.
For eye ends, the load should act through the center of the eye. For hook ends, the load should seat correctly in the bowl of the hook. Do not tip-load hooks or side-load eyes. For jaw ends, install the clevis pin and its retaining device correctly.
When working with wire rope, do not attach a bare rope directly to a turnbuckle unless the system is specifically designed that way. Use a proper wire-rope termination or terminal that matches the turnbuckle connection.
If your project involves selection, attachment, and general installation rather than tightening alone, see our turnbuckle usage guide.
Step 4: Rotate the Body to Increase Tension
Use the proper wrench or adjustment method for the turnbuckle design. Rotate the central body slowly while watching both end fittings.
The correct tightening direction is the direction that makes both fittings travel inward toward the body and shortens the complete assembly.
Do not depend on “clockwise tightens” as a universal rule. Clockwise changes with your viewing direction, and different installations can make that instruction misleading. The movement of the threaded ends is the reliable indicator.
As you rotate:
- keep the cable, wire rope, or terminal from twisting with the body;
- apply tension in small increments;
- watch that both threaded ends remain properly engaged;
- confirm the turnbuckle stays in line with the load;
- stop if the threads bind, the body bends, or a fitting starts to side-load.
If the turnbuckle becomes difficult to turn before the required tension is reached, do not solve the problem with more leverage. Misalignment, dirty or damaged threads, insufficient take-up, or excessive system load may be the real cause.
Step 5: Check the Required Tension
“Tight enough” is not a fixed turnbuckle setting. The correct tension depends on the system.
For a structural cable, wire-rope assembly, guy line, marine rig, machine support, or cable railing, use the tension specified by the equipment manufacturer, designer, engineer, or applicable installation instructions. When a measurable target is required, use the appropriate tension-measuring method.
Do not use the turnbuckle’s Working Load Limit (WLL) as the target tension. WLL is a rated load limit for the hardware; it is not an instruction to tension the system up to that value.
Likewise, a generic bolt-torque chart is not a reliable way to set turnbuckle tension. Turnbuckle tension depends on the complete system, not only thread diameter.
After the initial adjustment, check:
- cable sag or specified deflection;
- measured tension, if required;
- anchor and end-fitting alignment;
- thread engagement at both ends;
- any signs of distortion or binding.
Step 6: Lock the Adjustment and Reinspect
Once the required tension is reached, secure the turnbuckle against unintended rotation using the locking method intended for that design.
Do not confuse a jaw-end cotter pin with a turnbuckle body lock. The cotter pin or retainer secures the jaw pin; it does not automatically prevent the central body from rotating.
After locking, make a final visual check. Confirm the turnbuckle is still in line, the end fittings are properly engaged, and no connection moved while the lock was applied.
Common locking methods include:
- tightening compatible lock nuts against the turnbuckle body;
- installing lock wire where the turnbuckle is designed for it;
- using another manufacturer-specified positive locking device.
How to Tighten Wire Rope With a Turnbuckle?
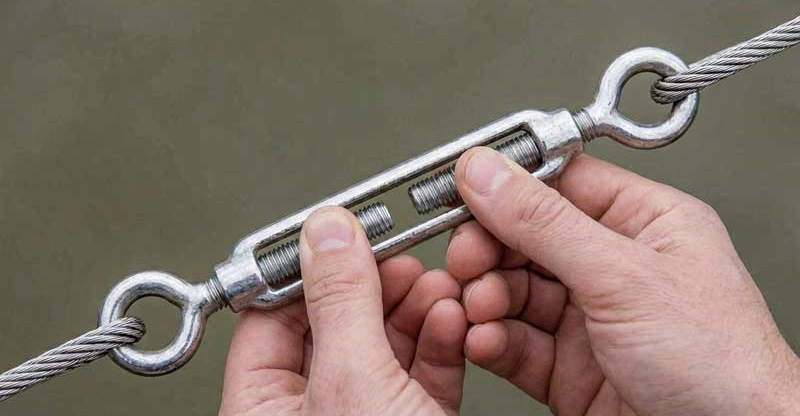
The basic adjustment is the same, but wire rope adds a few details that matter.
Use a Compatible Wire Rope Termination
A wire rope turnbuckle should connect through a termination that is designed for the rope and the end fitting. Depending on the system, this may be a swaged terminal, thimble-and-shackle connection, socket, or another approved termination.
The termination needs to carry the load without crushing, bending, or allowing the rope to slip.
Prevent the Wire Rope From Twisting
As the turnbuckle body rotates, a terminal can sometimes try to rotate with it. Hold or restrain the compatible fitting as needed so the turnbuckle adjusts without putting unwanted twist into the wire rope.
If you see the rope beginning to kink, open, or rotate abnormally, stop the adjustment and correct the setup.
Tension Gradually
Take up slack first, then increase tension in small increments. This gives the wire rope and terminations time to seat and makes it easier to monitor alignment.
On systems with several turnbuckles or multiple tension points, work in a controlled sequence so one adjustment does not overload another part of the assembly.
Recheck After the Assembly Seats
New or recently disturbed wire-rope systems can settle after the first tensioning cycle. Recheck the installation according to the system requirements and adjust again if necessary.
For industrial wire-rope applications, the turnbuckle is only one part of the load path. The rope, termination, connecting hardware, anchor, and turnbuckle all need compatible ratings and alignment.
How to Tighten Cable With a Turnbuckle?
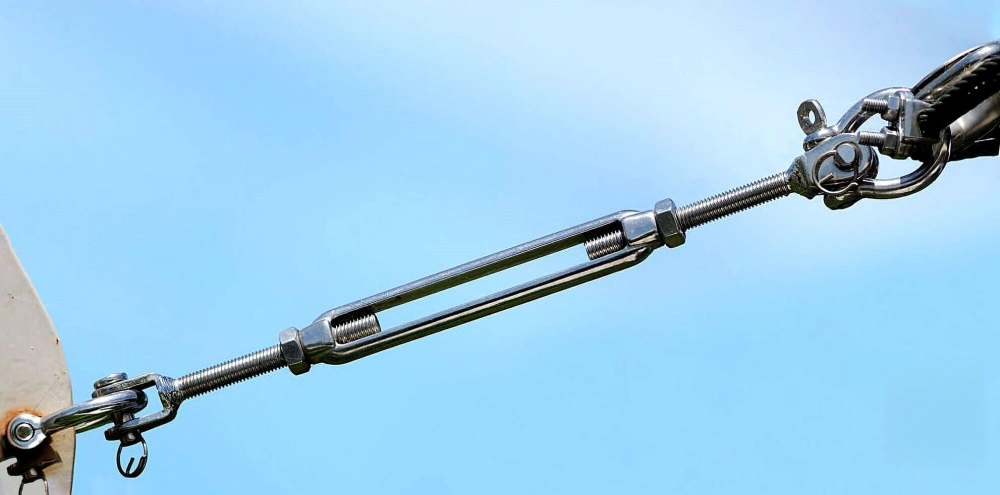
For general cable systems, the process is similar: connect both ends, keep the turnbuckle aligned, shorten the assembly by rotating the body, and stop at the specified cable tension.
The key difference is that “cable” can describe very different systems. Architectural cable railing, control cable, guy wire, structural cable, and general-purpose wire assemblies may have different tension limits and installation procedures.
If you are tightening a cable railing turnbuckle, use the railing system manufacturer’s tension specification and applicable building requirements. Do not use a generic rigging WLL or torque value as the target.
How Tight Should a Turnbuckle Be?
A turnbuckle should be tight enough to achieve the required system tension, but not so tight that the cable, anchors, end fittings, or turnbuckle are overloaded.
| Term | What it means |
| Required system tension | The tension the cable, rope, rod, or structure needs to perform correctly. |
| Working Load Limit (WLL) | The maximum allowable working load established for the hardware under specified conditions. It is a limit, not a target. |
| Turnbuckle take-up | The adjustment travel available as the threaded end fittings move in or out of the body. |
A good installation stays within all three constraints: it reaches the required tension, remains within the ratings of every component, and keeps adequate thread engagement and adjustment travel.
If you cannot reach the required tension before the turnbuckle runs out of take-up, do not force it. The assembly length or turnbuckle size needs to be corrected.
How to Keep a Turnbuckle From Loosening?
A properly tensioned turnbuckle can still rotate under vibration, cyclic loading, or movement if it is not secured.
Use Lock Nuts When Provided
Many turnbuckles can be supplied with compatible lock nuts. After setting the tension, tighten the lock nuts against the body as specified for the product. This creates resistance to unintended rotation.
Use Lock Wire on Designs Intended for It
Some applications use lock wire or seizing methods to prevent the body from turning. Use this only when the turnbuckle design and installation procedure allow it.
Use the Correct Retaining Hardware
Jaw-type turnbuckles rely on clevis pins and retainers to keep the jaw connection assembled. Make sure these parts are installed correctly, but remember that jaw-pin retention and body locking are separate functions.
Recheck High-Vibration or Long-Term Installations
Long-term installations should be secured against unscrewing and included in the inspection plan. Where vibration is present, inspection frequency should reflect the service conditions.
If a turnbuckle repeatedly loosens, do not keep retightening it without investigating the cause. Check the locking method, alignment, vibration, component compatibility, and condition of the threads.
Common Turnbuckle Tightening Problems
| Problem | Likely cause | What to do |
| The body turns but the cable twists | A terminal or fitting is rotating with the turnbuckle | Stop, prevent the terminal from rotating, and reset any twisted cable or wire rope. |
| The turnbuckle is very hard to turn | Side load, damaged/dirty threads, corrosion, or excessive existing tension | Stop and inspect. Do not add a cheater bar or hammer force. |
| One threaded end is almost out of the body | Uneven starting engagement or insufficient assembly length | Release tension safely, reset both ends with adequate engagement, or use the correct turnbuckle length. |
| The turnbuckle reaches the end of its take-up before tension is correct | Wrong take-up range or overall assembly length | Select a turnbuckle with suitable take-up or correct the system length. |
| The turnbuckle keeps loosening | Missing/incorrect locking method, vibration, or movement | Use the specified locking method and inspect the system for the underlying cause. |
| The body or end fitting starts to bend | Misalignment, side loading, overload, or incompatible hardware | Stop using the assembly and correct the load path. Damaged hardware should not remain in service. |
For additional examples of what not to do during installation, see our guide to common turnbuckle installation mistakes.
Turnbuckle Tightening Safety Checklist
- the turnbuckle and end fittings are rated for the application;
- the complete load path is straight and in line;
- the threads are in good condition and adequately engaged;
- both ends are connected with compatible hardware;
- the cable or wire rope is not twisted or kinked;
- the required system tension has been verified;
- the turnbuckle has not been tightened against the end of its take-up;
- the locking device is installed as designed;
- jaw pins and retainers are secured;
- the complete assembly has been reinspected after tensioning.
For lifting, load handling, engineered structural systems, or other safety-critical applications, always follow the equipment manufacturer’s instructions, the approved rigging or installation plan, and applicable standards. This general guide should not replace an application-specific procedure.
FAQ
Which way do you turn a turnbuckle to tighten it?
Rotate the body in the direction that draws both threaded end fittings inward and shortens the assembly. Avoid relying only on “clockwise” because the apparent direction changes depending on which end you are viewing. Watch the movement of the end fittings: inward increases tension; outward reduces it.
How do you tighten a wire rope with a turnbuckle?
Attach the turnbuckle through a compatible wire-rope termination, keep the assembly in line, and rotate the body so both threaded ends move inward. Prevent the terminal and wire rope from twisting, increase tension gradually, verify the required tension, then lock the turnbuckle against rotation.
How tight should a turnbuckle be?
Tighten it to the tension required by the cable, structure, machine, or system specification. Do not use the turnbuckle’s WLL as the target tension, and do not rely on a generic thread-size torque chart.
Can you overtighten a turnbuckle?
Yes. Excessive tension can overload the turnbuckle, end fittings, cable, anchors, or supporting structure. It can also use up the turnbuckle’s adjustment range and make future maintenance difficult. Stop at the specified system tension.
How do you lock a turnbuckle after tightening?
Use the locking method intended for the product, such as compatible lock nuts or lock wire on a design made for it. Jaw-end retaining pins secure the jaw connection but do not necessarily lock the turnbuckle body.
Choosing the Right Turnbuckle for Wire Rope and Cable
If you are specifying a new wire-rope or cable assembly, tightening performance starts with the correct hardware. Match the turnbuckle to the required working load, take-up, thread size, end fittings, material, and environment.
Powerful Machinery supplies industrial turnbuckles for wire rope, cable, construction, marine, and general rigging applications, including jaw, eye, hook, stainless-steel, and galvanized configurations.
Explore our turnbuckles or contact our team with your required load, take-up, end fittings, material, quantity, and application details. A correctly specified turnbuckle is easier to tension, easier to lock, and more reliable to inspect over the life of the assembly.